Slow Death Rig Technique for Walleye
You know, sometimes those walleye in South Dakota can be real tricksters. You've got your traditional jigs, your crankbaits, your bottom bouncers, and yet, there are days when nothing seems to entice them. That's when you start wondering if there's some secret weapon other anglers are using. Well, my friend, there often is, and today we're going to dive deep into one of the most effective, yet sometimes overlooked, methods for tempting finicky walleye: the Slow Death Rig technique. This guide is all about helping you understand, set up, and master this game-changing presentation, especially on our vast South Dakota waters.
What Exactly Is the Slow Death Rig, Anyway?
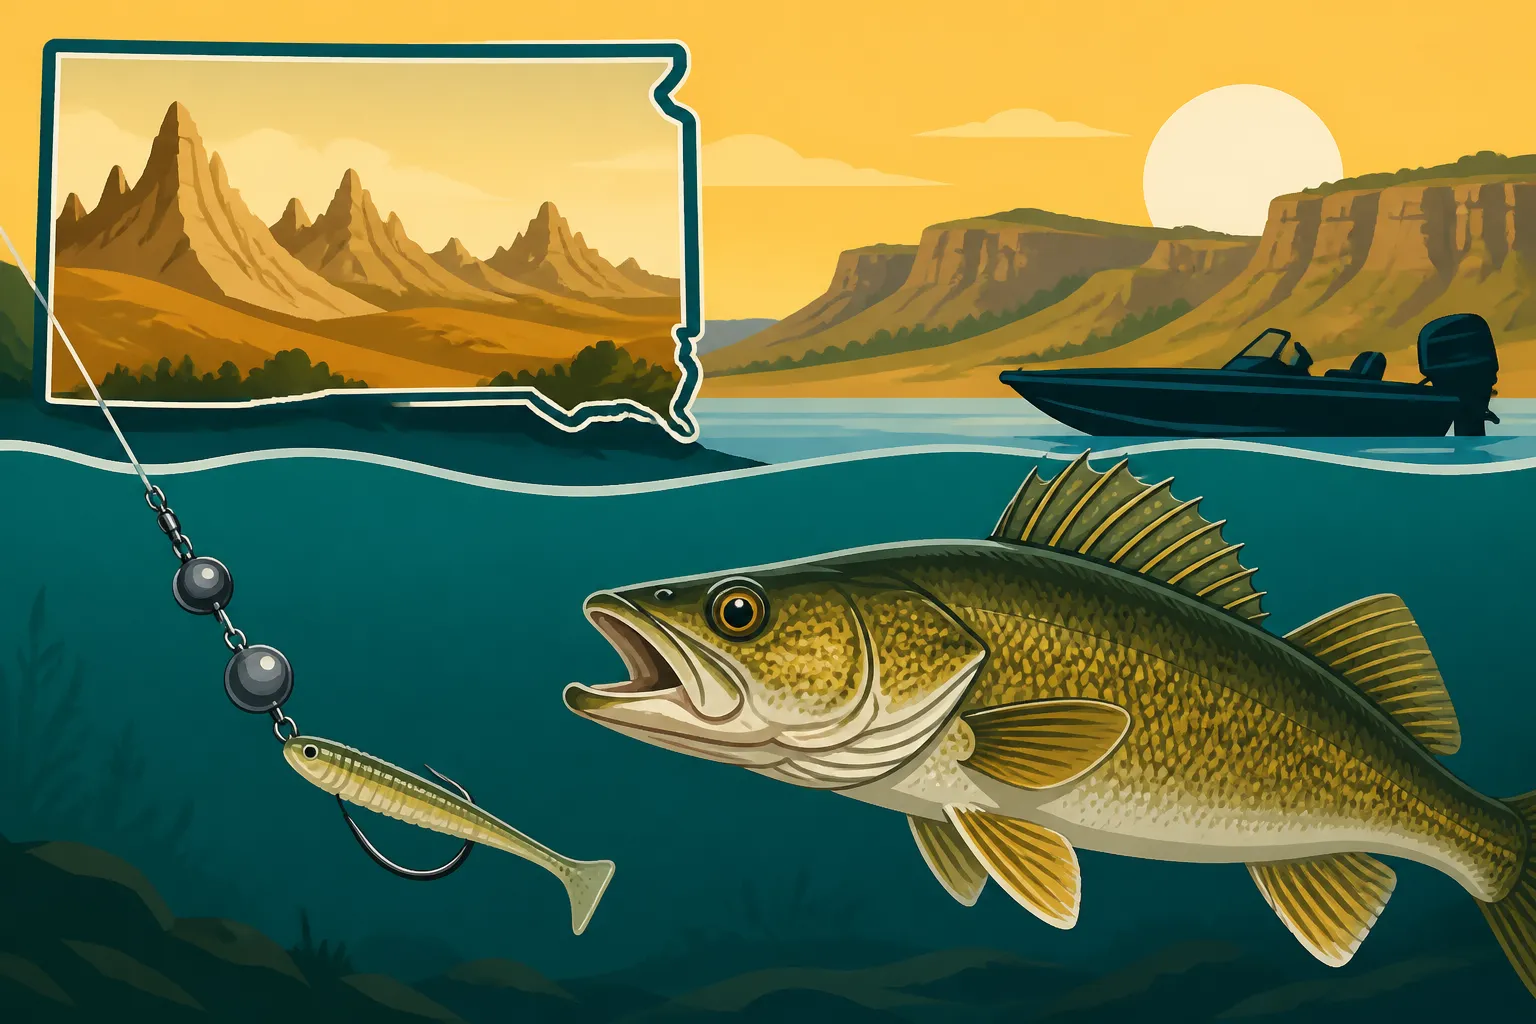
Before we get too far, let's talk about what this "Slow Death" thing actually is. It sounds a bit dramatic, doesn't it? But trust me, for a walleye, it can certainly be a slow, irresistible demise once they spot it. Essentially, the Slow Death Rig is a specialized presentation that takes a simple nightcrawler and makes it dance in a way that walleye just can't ignore. It's built around a unique hook design that, when trolled slowly, imparts a mesmerizing corkscrew action to your live bait.
Anatomy of the Slow Death Rig
At its heart, the Slow Death Rig is fairly minimalist, which is part of its beauty. You don't need a complicated tackle box full of components.
- The Hook: This is the star of the show, and what truly defines the "Slow Death" technique. It's a special hook, typically made from thin wire, with a distinct bend or kink near the eye. This bend is absolutely critical, as it's what creates that irresistible spinning action when the rig is in motion. Common sizes range from a #2 to a #4, depending on the size of your bait and the walleye you're targeting. Some of the most popular hooks are specifically marketed as "Slow Death" hooks, making them easy to identify.
- The Leader: Attached directly to your Slow Death hook is a monofilament or fluorocarbon leader. This leader should be relatively light, usually between 8 and 12-pound test, and about three to six feet long. The length can vary based on water clarity and the mood of the fish. A longer leader allows for a more natural presentation, keeping your weight further away from your bait, which can be crucial in clear waters or for pressured fish.
- The Swivel: At the end of your leader, opposite the hook, you'll want a quality barrel swivel or, even better, a ball-bearing swivel. This swivel serves a vital purpose: it prevents line twist. With your nightcrawler constantly spinning, you'd quickly turn your main line into a tangled mess without a good swivel. Some anglers also incorporate a small bead or two above the hook, between the hook and the knot, to add a bit of color or to protect the knot, though this is optional.
The Magic of the Bend: Why It Works So Well
So, what makes a nightcrawler wriggling on this particular hook so incredibly effective? It all comes down to that unique bend in the hook. When you thread a nightcrawler onto a Slow Death hook and pull it through the water at a slow trolling speed, that bend forces the nightcrawler to rotate in a seductive, corkscrew fashion.
Think about it from a walleye's perspective. Most injured baitfish or dying insects don't just swim in a straight line; they often flutter, spiral, or move erratically. The Slow Death Rig perfectly mimics this kind of vulnerable, wounded prey. It’s not just a subtle wiggle; it’s a full-on, eye-catching rotation that triggers a predatory response. This constant motion sends out vibrations that fish can detect, and the visual spectacle in the water is often too much for a curious walleye to resist. It’s a presentation that screams "easy meal!" without looking unnatural. This is a technique that's been proven to work wonders when conventional presentations fall short.
When and Where to Employ This Technique in South Dakota
The Slow Death Rig isn't just a niche technique; it's incredibly versatile for our South Dakota walleye fisheries. While it shines in specific situations, you'll find it can be effective throughout much of the open water season.
- Clear Water Conditions: On lakes like Oahe or Sharpe, especially when the water is clear, walleye can be notoriously spooky. The subtle yet compelling action of a Slow Death Rig, presented on a long fluorocarbon leader, can be just the ticket. The natural bait combined with the enticing spin helps to draw strikes from fish that might shy away from flashier, more aggressive lures.
- Finicky or Pressured Fish: Have you ever been on a lake where everyone is out, and the walleye seem to have lockjaw? This is a prime time to pull out the Slow Death Rig. When fish are getting a lot of pressure, they often become more selective. The natural bait and unique action offer something different, something they haven't seen a dozen times already that day. This can be especially true during post-front conditions or after heavy boat traffic.
- Specific South Dakota Waters: The Missouri River reservoirs – Lake Oahe, Lake Sharpe, Lake Francis Case, and Lewis and Clark Lake – are absolutely prime territory for Slow Death. The technique allows you to cover water efficiently while presenting a tempting meal to walleye holding on breaks, flats, or points. It's also excellent in some of the glacial lakes in eastern South Dakota where walleye populations thrive. When you're fishing areas with gradual depth changes or expansive flats, the Slow Death Rig, often paired with a bottom bouncer, is an absolute deadly combination. It's also a fantastic method to learn if you want to improve your overall How to Fish for Walleye in South Dakota skills.
Setting Up Your Slow Death Rig for South Dakota Walleye
Getting your Slow Death Rig set up correctly is paramount. It’s not overly complicated, but paying attention to the details will make all the difference in your success rate.
Choosing the Right Components: Hooks, Leaders, and Weights
Let’s break down the individual pieces you’ll need to assemble your Slow Death magic. Getting these right is like picking the perfect ingredients for a delicious meal – it all comes together for a fantastic outcome.
- Slow Death Hooks: As mentioned, these are specialized. Brands like Mustad and Gamakatsu offer excellent options. You can often find them explicitly labeled as "Slow Death" or "Aberdeen Bend" hooks. I typically carry a few different sizes, from a size 4 for smaller crawlers or when the bite is tough, up to a size 2 for chunkier nightcrawlers and when I’m targeting bigger fish. You can often find these in your local bait shop or readily available on platforms like Amazon. Having a good selection of these hooks on hand is a critical part of your South Dakota Fishing Gear Checklist.
- Leader Material: For your leader, a high-quality fluorocarbon line between 8-12 lb test is usually your best bet. Fluorocarbon is nearly invisible underwater, which is a huge advantage in clear South Dakota waters, and it offers excellent abrasion resistance. The standard leader length is around 3 to 6 feet. However, don't be afraid to experiment. On super clear days, lengthening your leader to 8 feet or even more can sometimes make a difference. Conversely, in stained water or when the fish are aggressive, a shorter leader might be more manageable.
- Bottom Bouncers: While the Slow Death Rig itself doesn't include a weight, it's almost always paired with a bottom bouncer. The bottom bouncer keeps your bait near the lakebed without getting snagged as often as a traditional sinker. Your choice of bottom bouncer weight depends heavily on the depth you're fishing and your trolling speed. Generally, you want just enough weight to maintain contact with the bottom at your desired speed.
- Rule of Thumb: A common starting point is to use about 1 ounce of weight for every 10 feet of water depth, but this is highly adjustable. If you're drifting slower or in less current, you might go lighter. If you're covering deeper water or have more current (like sections of the Missouri River), you'll need to go heavier. Carrying a range of weights, from 1/2 ounce up to 3 ounces, will prepare you for most situations.
- Swivels: Stick with good quality barrel or ball-bearing swivels. Interlock snap swivels are great for quickly changing out your bottom bouncer if you need to adjust weight. Size 7 or 10 swivels are usually sufficient.
Rigging Your Bait: The Critical Hook Placement
This is where the "Slow Death" action comes to life. Getting your nightcrawler on the hook correctly is crucial for achieving that seductive spin.
- Select Your Nightcrawler: Choose a lively, medium-sized nightcrawler. You don't want a huge one that's too bulky for the hook, nor a tiny one that won't have enough body to spin properly.
- Thread the Hook: Start by inserting the hook point into the very tip of the nightcrawler's head, right at the dark collar (the clitellum).
- Thread Along the Body: Gently thread the nightcrawler onto the hook shank, much like you would a plastic worm. You want the hook to run through the center of the nightcrawler's body. The goal is to get the point of the hook to exit the nightcrawler approximately halfway to two-thirds of the way down its body.
- Exposed Hook Point: Ensure the hook point is exposed and clear. The remaining tail of the nightcrawler should dangle freely behind the hook. This dangling tail, combined with the specific bend of the hook, is what creates the irresistible spinning action. If your nightcrawler is too long, you can pinch off a small piece of the tail, but leave enough for that natural, wiggling action.
- Check the Spin: Before you even cast out, drop your rigged nightcrawler into the water beside the boat and check its action. It should be spinning slowly and consistently. If it's not spinning, or it's spinning erratically, odds are the nightcrawler isn't threaded properly. Take it off and try again. This step is often overlooked but can save you a lot of fruitless trolling time.
The Art of Trolling: Speed, Depth, and Presentation
Once your rig is set up, the next step is to get it in the water and work its magic. Trolling with a Slow Death Rig is usually a slow affair, hence the name!
- Trolling Speed: Generally, you'll be trolling at very slow speeds, typically between 0.5 to 1.5 miles per hour. This speed range is what allows that specific hook bend to impart the perfect corkscrew action to your nightcrawler. Too fast, and the nightcrawler might just wash out and spin unnaturally or even unravel. Too slow, and it might not generate enough action. Experimentation is key on any given day. Factors like wind, current, and fish mood will influence the ideal speed. If you're specifically Trolling for Walleye on Lake Oahe, you'll notice how important speed control can be across its vastness.
- Maintaining Bottom Contact: The whole point of using a bottom bouncer is to stay in contact with the lakebed. You want that bouncer to occasionally "thump" or "tick" the bottom as you troll. This contact is important for two reasons: it tells you you're in the right depth zone, and the occasional thump can stir up sediment, attracting curious walleye. Pay close attention to your rod tip. You should see a gentle bounce as the bouncer touches down. If your rod tip is constantly bent over, you're either going too slow or using too much weight. If it's barely moving, you might be going too fast or not using enough weight.
- Presentation Angle: When trolling, it's generally best to keep your line at about a 45-degree angle to the water. This ensures your bottom bouncer is performing optimally and your Slow Death Rig is trailing enticingly behind it. If your line is too vertical, your bouncer might not trip correctly. Too horizontal, and you might not feel the bottom contact effectively.
- Using Multiple Rods: If legal in your area (always check local South Dakota fishing regulations regarding the number of lines allowed!), deploying multiple rods with different bottom bouncer weights or leader lengths can help you dial in the bite quicker. For instance, you might run one rod with a heavier bouncer closer to the boat to target a specific depth, and another with a lighter bouncer further back.
Mastering the Retrieve and Presentation
The real skill with the Slow Death Rig isn't just in the setup, but in how you present it and how you react to what the water (and the fish) are telling you.
Finding the Right Speed and Depth for Success
This is probably the most crucial aspect of fishing any live bait presentation, and especially the Slow Death Rig. Walleye are incredibly sensitive to presentation, and a slight adjustment can mean the difference between an empty livewell and a limit.
- Start with a Baseline: As mentioned, 0.5 to 1.5 mph is a good starting point for trolling speed. When you first drop your rig, watch your rod tip carefully. You want that gentle, rhythmic "thump, thump, thump" as your bottom bouncer dances along the bottom. If you're not getting that, adjust your speed or weight.
- Reading the Water: Pay attention to currents, especially on the Missouri River system. If you're trolling against a strong current, you'll need more weight and possibly a slower motor speed to achieve the same ground speed over the bottom. If you're going with the current, you might need less weight or a slightly faster motor speed. Wind also plays a huge role. On windy days, you might have to adjust your boat's direction and speed to counteract the wind's push on your boat.
- Depth Contours and Structure: Walleye are structure-oriented fish. They love to hang out on breaks, humps, points, and channel edges. When you're trolling, focus on these areas. Use your electronics to find transitions in depth, and then try to follow those contours. This technique allows you to systematically cover prime walleye real estate. Sometimes, you'll find them right on top of a hump; other times, they'll be suspended just off the edge of a drop-off. Continually watching your graph and knowing your boat's position relative to structure is vital. This is also where understanding South Dakota Fishing Depth Charts by Season can come in handy.
- Experimentation is Key: Don't be afraid to change things up. If you're not getting bites after 15-20 minutes, try increasing your speed slightly, then decreasing it. Try a heavier or lighter bottom bouncer. Sometimes, just changing the color of your bottom bouncer or adding a small colored bead above your hook can make a difference. Walleye often have subtle preferences on any given day.
Reading Your Electronics: What to Look For
Your fish finder isn't just for showing you depth; it's your window into the underwater world. Mastering its use with the Slow Death Rig will dramatically increase your success.
- Bottom Bouncer on Screen: With a good fish finder, you should actually be able to see your bottom bouncer bouncing along the bottom! This provides direct feedback that you're in contact with the lakebed. If you see it consistently lifting off the bottom, you know you need more weight or to slow down.
- Finding Fish: Look for arches or schools of baitfish. Walleye are often found near baitfish. If you see fish arches at a particular depth, adjust your presentation to ensure your Slow Death Rig is running at that same level. Sometimes walleye will be "belly to the bottom," and other times they might be suspended a few feet off the bottom, especially when chasing bait. Knowing how to interpret these signals on your sonar is crucial. Modern fish finders like those discussed in Best Fish Finders for South Dakota Lakes can offer incredible detail.
- Structure and Hard Bottom: Your electronics will show you depth changes, humps, and submerged timber. They can also indicate bottom composition – a harder return usually means rock or gravel, which walleye often prefer. Focus your Slow Death trolling runs over these types of structures. Mark waypoints when you catch a fish or see a promising concentration of fish or structure; this helps you return to productive areas.
- Water Temperature: Many fish finders also show water temperature. While the Slow Death Rig is effective across a range of temperatures, knowing the water temp can help you understand What Water Temperature Walleye Prefer and predict where walleye might be holding in the water column or along certain structures.
Common Mistakes to Avoid with the Slow Death Rig
Even with a seemingly simple rig, there are a few pitfalls that can cost you bites.
- Trolling Too Fast: This is probably the most common mistake. If you're going too fast, your nightcrawler won't spin correctly, or it might wash out and just look like a dead piece of bait. Always monitor your speed and check the action of your crawler by dropping it next to the boat before deploying.
- Improper Bait Rigging: If the nightcrawler isn't threaded straight or the hook point isn't exposed properly, you won't get that consistent, seductive spin. Take the time to rig your bait correctly. A poorly rigged crawler is a wasted cast.
- Not Maintaining Bottom Contact: Your bottom bouncer needs to be ticking the bottom. If it's too light, your bait will be too high in the water column, above where the walleye are often feeding. If it's too heavy, you'll feel every snag and your presentation won't be as subtle. Find that sweet spot where you're gently tapping the bottom.
- Using Stale or Dead Nightcrawlers: Walleye are attracted to the natural scent and movement of live bait. A fresh, lively nightcrawler is always better than one that's been sitting in the sun all day or looks like it's seen better days. Keep your crawlers cool and fresh.
- Lack of Experimentation: Don't get stuck in a rut. If what you're doing isn't working, change something! Adjust speed, weight, leader length, or even the size of your nightcrawler. Sometimes a minor tweak can ignite the bite.
Optimizing Your Slow Death Experience in South Dakota
The Slow Death Rig is fantastic on its own, but understanding how to integrate it into your overall fishing strategy and fine-tune it for various conditions will make you a truly formidable walleye angler.
Pairing with Other Techniques and Baits
While nightcrawlers are the classic bait for the Slow Death Rig, don't limit yourself! The principle of a slowly spinning bait can be adapted.
- Mix with Artificials: Sometimes, a small plastic worm or a fluke-style bait threaded onto a Slow Death hook can provide a similar action, especially if you're out of live bait or prefer to use artificials. While it won't have the natural scent, the action can still be very enticing. You can also tip a Slow Death rig with a small piece of Gulp! or other scented artificial plastic for added attraction.
- Bottom Bouncer Versatility: The beauty of the bottom bouncer setup is that you can easily swap out your Slow Death Rig for other presentations. If the bite is aggressive, you might switch to a crankbait or a spinner rig (like a Lindy Rig or Walleye Crawler Harness) trailing behind the bouncer. This flexibility makes the bottom bouncer an essential tool for any South Dakota Walleye Fishing Guide.
- Adding Attractors: Some anglers like to add a small colorful bead or two directly above the Slow Death hook for added visual appeal, especially in stained water. The flash or color can sometimes draw attention, mimicking the look of a grub or larva.
Seasonal Considerations for Slow Death Fishing
The Slow Death Rig is truly a year-round open water technique in South Dakota, but its effectiveness can fluctuate with the seasons.
- Spring: As the water warms after ice-out and walleye transition from spawning, they can often be found in shallower bays and on flats. A Slow Death Rig presented slowly can be highly effective for these post-spawn fish that are often a bit lethargic and looking for an easy meal. This is a great time to implement your South Dakota Spring Walleye Fishing Techniques.
- Summer: This is arguably the prime time for Slow Death. As walleye move to deeper main lake structures, humps, and points, especially on the big Missouri River reservoirs, Slow Death rigs paired with bottom bouncers excel at covering water and tempting fish. It's fantastic for those mid-day lulls when fish aren't as aggressive. You can really get into a rhythm with South Dakota Summer Walleye Fishing Techniques using this method.
- Fall: As water temperatures begin to drop, walleye often go on a feeding frenzy in preparation for winter. The Slow Death Rig remains a strong contender, particularly for fish that are still holding to deeper structures or those that have moved into shallower areas to feed on baitfish. It's a key part of many anglers' South Dakota Fall Walleye Fishing Techniques. The slower presentation can be key as the metabolism of the fish starts to slow down with the cooling water.
Troubleshooting: When the Bite is Tough
We all have those days when the fish just aren't cooperating. Instead of throwing in the towel, try these troubleshooting tips with your Slow Death Rig:
- Adjust Speed (Again!): Even a 0.1 mph change can make a difference. Cycle through your speed range from 0.5 to 1.5 mph until you find what the fish prefer.
- Change Leader Length: If the water is crystal clear and fish are shy, lengthen your fluorocarbon leader. If the water is stained or fish are aggressive, a shorter leader might work.
- Vary Bottom Bouncer Weight: Are you bouncing too much or not enough? Adjust your weight to maintain that subtle bottom contact. Sometimes, a slightly heavier bouncer will create more commotion and draw strikes, while other times a lighter one feels more natural.
- Try Different Nightcrawler Sizes: A smaller, thinner nightcrawler might be what picky walleye want, especially on tough days.
- Add Scent: While nightcrawlers have their own natural scent, adding a dab of walleye attractant or using a scented artificial tipping can sometimes provide that extra edge.
- Change Presentation Angle: If you're going with the current, try turning and going against it, or vice versa. The angle of attack on a structure can change how walleye react.
- Explore Different Depths: If you're not getting bites at 20 feet, try moving shallower to 15, or deeper to 25. Walleye can move quite a bit throughout the day.
- Consider a Different Location: If a spot isn't producing, don't be afraid to pull up stakes and move to another promising area, whether it's a different point, hump, or flat. Use your chart plotter to find new potential walleye hideouts.
The Slow Death Rig, once you get the hang of it, is a remarkably simple yet incredibly effective way to catch walleye in South Dakota. It capitalizes on a walleye's predatory instincts with a wounded-baitfish presentation that's hard to beat. Spend some time practicing your rigging and finding that sweet spot for speed and depth, and you'll soon discover why so many anglers swear by the Slow Death technique.
| Feature / Technique | Slow Death Rig (with Bottom Bouncer) | Traditional Jigging (Jig & Minnow) | Trolling Crankbaits |
|---|---|---|---|
| Primary Bait/Lure | Live Nightcrawler on specialized hook | Live Minnow or plastic grub on jig | Hard-bodied crankbait |
| Action | Slow, seductive corkscrew spin | Vertical hop, darting, or retrieve | Diving, wobbling, rattling |
| Target Depth | Bottom-hugging to suspended near bottom | Bottom contact, vertical zones | Varies by crankbait, can cover wide range |
| Trolling Speed | Very slow (0.5-1.5 mph) | Drift/slow retrieve (0-0.5 mph) | Moderate to fast (1.5-3.5 mph+) |
| Best Conditions | Finicky fish, clear water, post-front, covering flats/breaks | Targeting specific structure, active biters, vertical presentations | Aggressive fish, covering large areas, triggering reaction strikes |
| Equipment Focus | Specialized Slow Death hooks, bottom bouncers, light leader | Sensitive rod, varied jig weights, quality live bait | Long trolling rods, line counter reels, varied crankbait depths |
| Pros | Highly effective on pressured fish, natural presentation, covers water | Excellent for precise targeting, versatile, good for vertical jigging | Covers water quickly, triggers reaction bites, good for finding active fish |
| Cons | Can be slow, requires live bait, can snag if not careful | Can be snaggy, requires good boat control for precision | Less natural presentation, can be less effective on finicky fish |
Disclaimer
This article is for general informational purposes only and does not constitute professional advice. Laws, prices and regulations vary by location and change over time. Consult a qualified professional for guidance on your specific situation.