How to Fish a Jig and Minnow Combo
Ever stared at a jig and a bucket of lively minnows, wondering how to turn that classic, unassuming combination into a stringer full of feisty walleye, crappie, or even a bonus perch? It’s a timeless setup for a reason, but simply dropping it in the water often isn't enough. Many anglers get frustrated when their buddy is hauling them in and they’re getting nothing. This comprehensive guide is dedicated to demystifying the art and science of fishing a jig and minnow combo, providing you with the real-world tips and nuanced techniques to consistently entice fish across South Dakota's diverse and often challenging waters.
Why the Jig and Minnow Combo Remains an Angler's Secret Weapon
Let's be honest, in a world full of high-tech lures, fancy electronics, and exotic rigs, the humble jig and minnow might seem a bit… basic. But don't let its simplicity fool you. For generations of South Dakota anglers, this combo has been, and continues to be, one of the most effective tools in the tackle box, especially when fish are finicky or the bite is tough. It's a fundamental technique that every successful angler here has in their arsenal, from the big Missouri River reservoirs to the smaller glacial lakes.
Unmatched Versatility Across Species and Seasons
One of the biggest reasons the jig and minnow reigns supreme is its incredible versatility. We're talking about a setup that can put walleye in the boat from Lake Oahe in the spring, entice crappie in the shallows of Lake Poinsett during summer, fool a wary perch under the ice on Bitter Lake, or even tempt a smallmouth bass along rocky shorelines on Lake Francis Case. It's truly a year-round, multi-species marvel.
Think about it: during the cold water periods of spring and fall, when fish are sluggish and not willing to chase, a live minnow on a jig offers a natural, slow-moving meal they can’t resist. Then, during the peak of summer, when fish might be suspended or holding tight to structure, a quick jigging action can mimic a wounded baitfish, triggering a reaction strike. Even in the depths of winter, under inches of ice, a subtle twitch of a minnow-tipped jig is often the key to unlocking a hot bite. This adaptability means you can carry a handful of jigs and a bucket of minnows and be prepared for almost anything South Dakota throws at you. For more specific insights on targeting various species, check out our comprehensive guides, such as the South Dakota Walleye Fishing Guide or the South Dakota Crappie Fishing Guide.
The Irresistible Natural Appeal
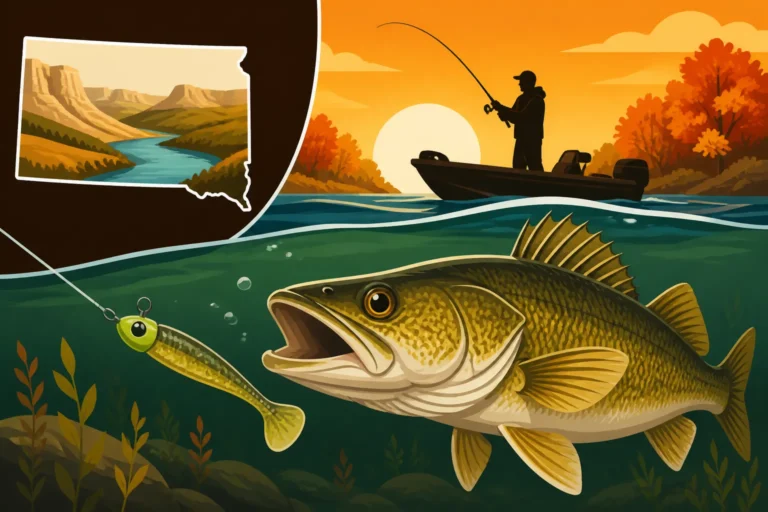
While artificial lures have their place and can be incredibly effective, there's just something about live bait that often puts them over the top. A live minnow, struggling on the end of a jig, emits natural scents, vibrations, and movements that no artificial lure can perfectly replicate. Fish, being creatures of instinct, are often drawn to this authentic presentation, especially when they are lethargic or pressured. The natural bait acts as a powerful attractant, often persuading even the most hesitant fish to strike.
Imagine a walleye hunkered down on a rock pile. A crankbait might fly past too quickly, or a plastic grub might not convince it. But a lively minnow, twitching and trying to swim away from a jig, often triggers that primal predatory response. It's a high-percentage play that often turns a slow day into a memorable one. Plus, the minnow adds bulk and scent, making your presentation more enticing and giving the fish something substantial to key in on.
Choosing the Right Gear for Your Jig and Minnow
Getting the right jig and minnow combination isn't just about grabbing the first thing off the shelf. It's about understanding the nuances of how different jig types and minnow species interact, and pairing them with the right rod and line to maximize your feel and presentation. This is where attention to detail really pays off, transforming a generic setup into a finely tuned fish-catching machine.
Jig Head Selection: Weight, Color, and Shape
The jig head is the foundation of this combo, and its characteristics play a huge role in your success. You'll want a variety on hand, and reputable brands like Northland Fishing Tackle, VMC, and Gamakatsu offer excellent options you can often find readily on Amazon.
-
Weight: This is crucial for getting to the right depth and maintaining control.
- Light Jigs (1/16 to 1/8 oz): Perfect for shallow water (under 10 feet), minimal current, or when fish are extremely finicky and a slow fall is key. They offer a more natural, subtle presentation.
- Medium Jigs (1/4 to 3/8 oz): Your workhorses for most situations. They're great for depths of 10-25 feet, moderate current, and when you need to feel bottom but still want a natural drift.
- Heavy Jigs (1/2 oz and up): Essential for deep water (25+ feet), strong currents (like the tailwaters below the Missouri River dams), or when fishing in windy conditions where you need to maintain contact with the bottom.
-
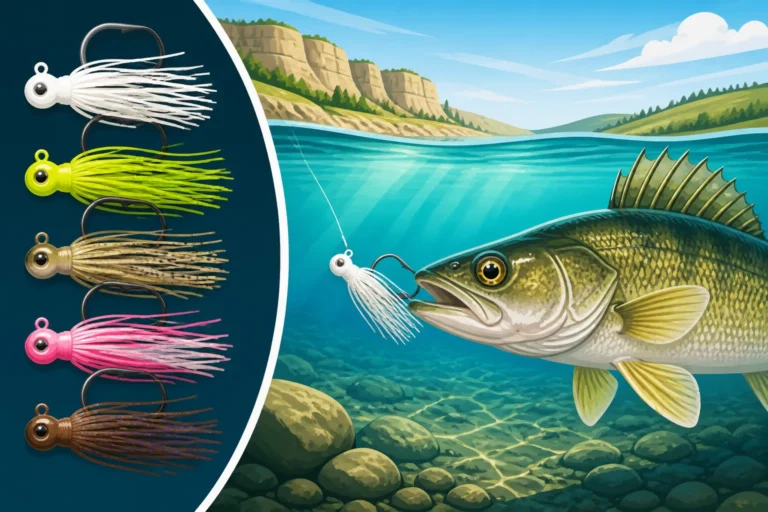
Color: While the minnow provides the primary appeal, jig color can act as an accent or an attractor, especially in stained water.
- Natural Colors: Green, brown, black, and white mimic baitfish or natural forage. These are great for clear water or when fish are shy.
- Bright/Fluorescent Colors: Chartreuse, orange, pink, and glow-in-the-dark jigs excel in dirty water, low light conditions (dawn/dusk), or deep water where visibility is limited. They create a "hot spot" that fish can key in on. Sometimes a flashy jig head can trigger a reaction strike even if the minnow is the main course.
-
Shape: Different jig head shapes provide different actions.
- Round Head Jigs: The most common and versatile. They fall naturally and have a subtle darting action when jigged. Great for vertical presentations.
- Stand-Up Jigs: Designed to sit upright on the bottom, presenting your minnow vertically. This is fantastic when fish are feeding directly off the bottom, as it keeps your bait in their strike zone and reduces snags in rocky terrain.
- Banana/Bullet Head Jigs: Often used for casting and retrieving, as their streamlined shape moves through the water efficiently.
- Weedless Jigs: Equipped with brush guards, these are invaluable when fishing around heavy cover like submerged timber or thick weeds, helping to prevent snags while still presenting your minnow effectively.
Minnow Species and Hooking Techniques
The minnow you choose and how you hook it can make a real difference.
-
Minnow Species:
- Fatheads (Rosy Reds): Widely available, hardy, and a go-to for many panfish and smaller walleye. Their robust nature makes them great for active jigging.
- Shiners (Golden, Emerald): Often larger and livelier, perfect for targeting bigger walleye or crappie. Their flash in the water can be a major attractant.
- Rainbow/Arkansas Shiners: Excellent choice, particularly for walleye, due to their size and silvery flash. They are often what trophy walleye are keying in on. Always check local regulations on minnow species, as some may be restricted.
-
Hooking Techniques:
- Through the Lips (Top to Bottom): The most common method. This allows the minnow to swim naturally and stay lively for a long time. It’s ideal for casting and slow retrieves, or when drift fishing.
- Through the Back (Just Behind the Dorsal Fin): Best for vertical jigging or when fish are hitting short. It keeps the minnow horizontal and often causes it to struggle more, creating extra appeal. Be careful not to damage the spine, which can kill the minnow quickly.
- Through the Tail: Less common, but useful when fish are finicky and just nipping at the tail, or for a very subtle vertical presentation. It makes the minnow swim downward.
Regardless of how you hook it, always aim for minimal injury to keep the minnow alive and kicking. A lively minnow is a biting minnow!
Rod, Reel, and Line for Maximum Sensitivity
Your rod, reel, and line are your connection to the fish, and sensitivity is the name of the game when fishing a jig and minnow.
-
Rod:
- Length: 6' to 7'6" is a good range. Shorter rods (6' to 6'6") are great for vertical jigging from a boat, offering precision and quick hook sets. Longer rods (7' to 7'6") are better for casting, making longer drifts, or covering more water.
- Action: A fast or extra-fast action is crucial. This means the rod bends mostly in the tip section, allowing for incredible sensitivity to feel those subtle bites and providing a powerful backbone for hook sets.
- Power: Light to medium-light power for panfish and smaller walleye, and medium power for larger walleye or northern pike. The lighter the power, the more sensitive the rod.
-
Reel: A good quality spinning reel in the 1000 to 2500 size range, known for its smooth drag and light weight, is ideal. Brands like Shimano and Daiwa are often highly rated on Amazon for their reliability and performance. A smooth drag is essential when fighting a powerful fish on light line.
-
Line: This is often overlooked but incredibly important for feel.
- Braided Line (6-10 lb test): Offers no stretch, meaning incredible sensitivity to feel even the lightest taps. It’s also very strong for its diameter. The downside is its visibility, so always tie on a fluorocarbon leader (4-8 lb test, 18-36 inches long) to make your presentation nearly invisible to fish.
- Monofilament (6-8 lb test): More forgiving with some stretch, which can be good if you tend to set the hook too hard. It's more visible than fluorocarbon but less visible than braid. It's also more affordable.
- Fluorocarbon (6-8 lb test): Nearly invisible underwater and has less stretch than mono, providing a good balance of sensitivity and stealth. It's a great choice if you prefer a single line type.
Experiment with these combinations to find what feels right for you and the conditions you're fishing. For details on appropriate setups, see our guide on Best Fishing Rods and Reels for Walleye.
Mastering the Presentation: Techniques for Success
Once you have the right gear, the next step is learning how to present that jig and minnow combo effectively. This isn't a "one size fits all" situation; successful anglers adapt their technique to the conditions, the species, and the mood of the fish.
Vertical Jigging: Precision in the Depths
Vertical jigging is perhaps the most iconic way to fish a jig and minnow, especially for walleye on the Missouri River system. The key here is precise boat control and a keen sense of feel.
- Boat Control is Paramount: Whether using a bow-mount trolling motor or drifting with the wind, the goal is to keep your boat moving slowly and your jig directly beneath you. On Lake Sharpe, for example, maintaining a consistent speed that allows your jig to hit the bottom occasionally without dragging too much is crucial.
- The Lift and Drop: This is the basic cadence. Drop your jig to the bottom, then lift it sharply 6-18 inches, letting it fall back on a semi-slack line. The bite often occurs on the fall. Vary the height of your lift and the speed of your fall until you find what triggers bites. Sometimes a sharp snap is needed, other times a gentle "lift and hold" is better.
- Feeling the Bite: This is where rod sensitivity and braided line shine. Walleye bites can be incredibly subtle – a slight tick, a spongy feeling, or just a sudden heaviness on the line. Don't wait for a huge tug; set the hook at any unusual sensation. Practice will help you distinguish a bite from bumping bottom or snags. In turbulent tailwater areas, mastering Jigging Techniques for Missouri River Walleye is key.
Casting and Retrieving: Covering Water and Triggering Strikes
While vertical jigging is for precision, casting lets you cover more ground and target fish spread out over flats or along weed lines.
- The Slow Roll: Cast your jig and minnow out, let it sink to the bottom (or just above where you expect fish), then slowly retrieve it with occasional pauses and subtle lifts. This mimics a baitfish foraging along the bottom. This is effective in shallower bays of Lake Oahe in early spring.
- Snap-Jigging: After casting, let the jig hit bottom. Then, with a sharp snap of the wrist, lift the rod tip quickly, moving the jig several feet off the bottom. Immediately drop the rod tip, allowing the jig to fall back on a slack or semi-slack line. Retrieve a few turns, then repeat. This aggressive action is great for triggering reaction strikes from active fish, particularly for smallmouth bass.
- Targeting Structure: Cast your jig and minnow to specific structures like rock piles, submerged logs, or weed edges. Let it settle, then work it slowly around the structure, paying close attention to any changes in line tension.
Drift Fishing and Slip Bobbers: Effortless Coverage
Sometimes, letting the wind or current do the work for you is the most effective approach.
- Drift Fishing: This is a fantastic way to cover large areas of water, especially on expansive bodies like Lake Francis Case. Simply deploy your jig and minnow, let out line, and allow the boat to drift with the wind or current. You can fish multiple rods, varying jig weights to ensure some are ticking bottom while others are suspended. Pay attention to your line angle and keep it as vertical as possible to maintain feel.
- Slip Bobber Rigging: When fish are suspended at a specific depth or holding over cover, a slip bobber rig with a jig and minnow is incredibly effective. The slip bobber allows you to set your depth precisely, and the minnow can swim naturally beneath it. Cast it out and let the minnow do the work. This is a great technique for crappie hovering around submerged brush piles or for walleye suspended in deeper water. Check out our How to Rig a Slip Bobber for Walleye guide for more details.
Ice Fishing Specifics: Cold Water, Subtle Bites
Fishing a jig and minnow through the ice requires its own set of skills, as fish are often more lethargic in cold water. You can find many specialized ice fishing jigs on Amazon, designed for these conditions.
- Jigging Cadence: Smaller, lighter jigs (1/16 to 1/8 oz) are generally preferred. Start with a series of small, subtle lifts and drops, then pause. Sometimes, a long, dead-stick pause is when the fish will finally commit. Other times, a more aggressive jigging motion to attract attention, followed by a pause, is the ticket.
- Hole Hopping: Don't be afraid to move! If you're not getting bites after 15-20 minutes in one hole, drill new holes and try again. Fish often group up, and finding the active school is key to a productive ice fishing day. Our South Dakota Ice Fishing Guide offers more in-depth techniques for winter success.
- Stealth: Fish under the ice are often more sensitive to noise and vibrations. Walk softly, keep loud noises to a minimum, and use a dark-colored ice shelter to reduce your silhouette above the hole, especially in clear ice conditions. For essential winter gear, check out the South Dakota Ice Fishing Gear Guide.
Reading the Water and Adapting Your Approach
Even with the best gear and techniques, consistent success with a jig and minnow comes down to understanding the environment and adjusting your strategy. South Dakota waters can change rapidly, and being able to read those changes is a skill that only comes with experience and observation.
Depth and Structure: Where Fish Hold
Fish are creatures of habit and structure. Understanding where they're likely to be holding is paramount.
- Contour Lines and Drop-Offs: Fish often position themselves along contour lines, especially drop-offs where they can ambush baitfish or quickly move between deep-water safety and shallower feeding grounds. Use your fish finder or a good lake map to identify these breaks. Working a jig and minnow along these transition zones, like those found on Lake Sharpe, can be highly effective.
- Humps and Points: Submerged humps (underwater islands) and points extending into the water are prime real estate for walleye, smallmouth bass, and crappie. Fish the sides, top, and leading edges of these structures, adjusting your depth until you find the fish.
- Weed Beds and Rock Piles: These provide cover, oxygen, and food for baitfish, making them attractive to predators. Fish the edges of weed beds, the pockets within them, and directly over and around rock piles. A weedless jig might be your best friend here. For more insights, see How to Fish Deep Water Structure in Summer.
Water Temperature and Clarity: How They Influence the Bite
Water conditions profoundly impact fish behavior and, by extension, how you should present your jig and minnow.
- Temperature's Role: Cold water (below 50°F) generally means more sluggish fish. Your presentation should be slower, more subtle, with longer pauses. As water warms (55-70°F for walleye, for example), fish become more active, and you can experiment with more aggressive jigging motions. Understanding What Water Temperature Walleye Prefer? can significantly improve your timing.
- Clarity's Impact:
- Clear Water: In clear water, fish have excellent visibility and are often more wary. Use natural jig colors (greens, browns, blacks), lighter line, and a fluorocarbon leader. A slow, subtle presentation is usually best, and avoid heavy thumping on the bottom that might spook fish.
- Stained/Turbid Water: Fish rely more on scent and vibration in murky conditions. Brighter, fluorescent jig colors (chartreuse, orange, glow) can be very effective as they stand out. The minnow's natural scent also becomes even more crucial here. Sometimes, a slightly heavier jig that creates a bit more vibration on the drop can also help fish locate your bait.
You can gain more depth on these factors by reading our article on Reading Water Temperature for Walleye.
Understanding the Bite: Subtle Taps vs. Aggressive Pulls
Perhaps the most challenging aspect of jig and minnow fishing is learning to interpret the "bite." It's rarely a dramatic tug; often, it's a very subtle communication from the fish.
- The "Tick": This is a classic walleye bite. It feels like a very light tap or tick on the line as the fish inhales the minnow. If you feel it, set the hook immediately.
- The "Weight" or "Spongy" Feeling: Sometimes, your jig will just feel heavier than it should, or like you've hooked a sponge. This often means a fish has inhaled the minnow and is simply holding it in place. Again, set the hook!
- The "Slack Line" Bite: Incredibly frustrating but common, especially with light-biting fish. You might be lifting your jig, then when it falls, your line goes slack before it should. This indicates a fish picked it up on the fall and is swimming towards you. Reel up the slack and set the hook with authority.
Missing these subtle bites is a common frustration, but with practice, you'll develop the "feel." Pay attention to your line – any twitch, jump, or unnatural movement can indicate a bite. Remember, always set the hook with a sharp, upward sweep of the rod, especially when using braided line, to ensure the hook penetrates cleanly. Knowing the Best Time of Day to Catch Walleye in Summer can also help you predict periods of increased aggression.
Jig and Minnow Setup Comparison Table
To help you visualize some common jig and minnow setups for various South Dakota scenarios, here's a quick comparison:
| Scenario | Jig Head Weight (oz) | Jig Head Color | Minnow Type | Hooking Method | Rod Power/Action | Line/Leader | Notes |
|---|---|---|---|---|---|---|---|
| Shallow Spring Walleye | 1/16 – 1/8 | Chartreuse, Orange | Fathead | Through Lips | Light/Fast | 6 lb Braid / 6 lb Fluoro | Slow retrieve, long pauses, especially near shallow flats. |
| Deep Summer Walleye | 1/4 – 1/2 | Green, Glow | Shiner, Rainbow | Through Back | Med/Fast | 8 lb Braid / 8 lb Fluoro | Vertical jigging on breaks, strong lifts, feel for subtle bites. |
| Ice Fishing Perch/Crappie | 1/32 – 1/16 | Glow, Pink | Small Fathead | Through Back/Tail | Light/Extra-Fast | 4 lb Mono / 4 lb Fluoro | Subtle jigging, long dead-stick pauses, often near bottom. |
| Missouri River Current | 3/8 – 3/4 | Natural, White | Large Shiner | Through Lips/Back | Med-Heavy/Fast | 10 lb Braid / 10 lb Fluoro | Heavy jig to maintain bottom contact, strong snaps, quick hook sets. |
| Smallmouth Bass (Rocks) | 1/8 – 1/4 | Black, Brown, Green | Fathead, Shiner | Through Lips | Med-Light/Fast | 6 lb Braid / 6 lb Fluoro | Cast & snap-jigging around riprap and rock piles. |
This table serves as a starting point. The real key is to experiment with different combinations until you find what the fish are responding to on any given day. Always be prepared to change your jig weight, color, or even how you hook your minnow.
Final Thoughts on Your Jig and Minnow Journey
Fishing a jig and minnow combo is more than just a technique; it's an art form that connects you to the natural rhythms of the water. It demands patience, observation, and an eagerness to learn from every cast and every missed bite. The satisfaction of feeling that subtle "tick" and setting the hook on a beautiful South Dakota walleye or a feisty crappie is truly unmatched.
So, next time you head out to your favorite lake or stretch of river, grab a bucket of minnows, a handful of jigs from your tackle box (or picked up conveniently on Amazon), and embrace this timeless method. Pay attention to the details, adapt to the conditions, and most importantly, enjoy the process. Happy fishing!
Disclaimer
Fishing regulations and conditions can change. Always consult the latest South Dakota Game, Fish and Parks regulations handbook before heading out on the water. This guide provides general information and techniques; individual results may vary.