How to Set Up a Downrigger for Salmon
Trying to target those elusive Chinook salmon in the vast, deep waters of South Dakota's Lake Oahe can feel like an impossible puzzle. You know they're down there, but getting your lure into their strike zone and keeping it there consistently is the biggest hurdle. This comprehensive guide will walk you through exactly how to set up a downrigger, transforming your deep-water trolling game and significantly increasing your chances of landing those prized salmon.
The Essential Role of Downriggers for South Dakota Salmon
Anglers often get frustrated watching their fish finder light up with salmon marks at 50, 60, or even 100 feet down, only to have their traditional trolling setups fail to reach or maintain that precise depth. This is where downriggers become absolutely indispensable. For South Dakota salmon, especially the impressive Chinook in Lake Oahe, hitting that perfect depth is not just an advantage—it's often the difference between a memorable day and coming home empty-handed.
Why Depth Control is Non-Negotiable for Chinook Salmon
Chinook salmon, especially the mature, larger ones, are primarily cold-water fish. In large reservoirs like Lake Oahe, they'll seek out specific thermal layers, often referred to as the thermocline, where water temperatures are ideal and baitfish congregate. These layers can be surprisingly narrow, sometimes just a few feet thick, and they're often found at considerable depths, far beyond what even weighted lines and diving crankbaits can consistently reach or hold.
Without a downrigger, your lure is constantly rising and falling, battling water resistance and boat speed changes. You might get your lure down there momentarily, but it's incredibly difficult to keep it at a precise depth for extended periods. Salmon are often very particular. If your lure is five feet above or below their preferred feeding depth, you might as well be fishing on a different lake. This precision is critical; imagine trying to offer a picky eater their favorite meal, but it's always just out of reach. A downrigger solves this problem by mechanically taking your lure down to an exact, adjustable depth and holding it there, regardless of your trolling speed or water currents. This consistency is why serious salmon anglers swear by them.
Understanding the Basic Components of a Downrigger System
Before you can set one up, it's helpful to understand the various pieces that make up a complete downrigger system. Think of it like assembling a complex Lego set; each piece has a specific function.
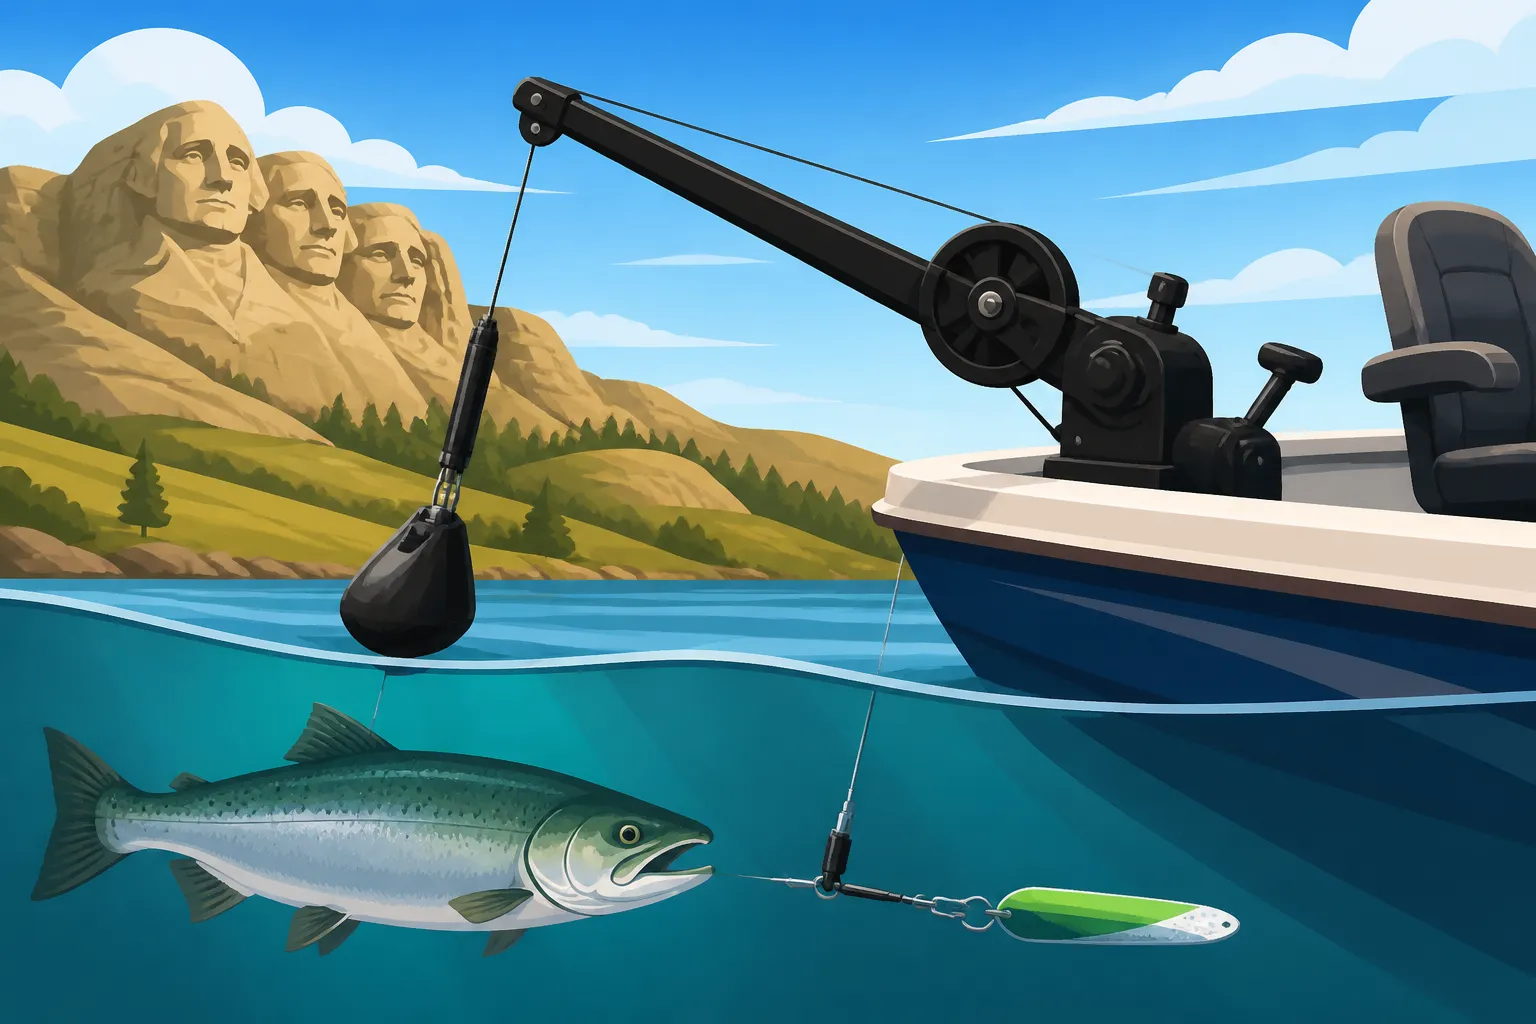
At its core, a downrigger consists of:
- The Boom: This is the arm that extends out from your boat, positioning the downrigger ball and line away from the boat's hull and propeller wash. Booms come in various lengths, with longer booms helping to spread your lines and avoid tangles.
- The Downrigger Line (Cable or Braid): This is the main line that runs from the spool, through the boom, and down to the downrigger ball. While stainless steel cable used to be standard, many anglers are now opting for heavy-duty braided lines for their strength, quiet operation, and lack of electrical interference, which can sometimes be an issue with metal cables.
- The Downrigger Ball (Weight): This heavy lead or composite weight is what pulls your downrigger line and, crucially, your fishing line, down to the desired depth. Balls typically range from 8 to 15 pounds, with 10-12 pounds being a common choice for salmon on Lake Oahe to combat strong currents or faster trolling speeds.
- The Release Clip: This ingenious device is perhaps the most critical component. It attaches your fishing line to the downrigger line (or directly to the ball) and holds it until a fish strikes. When a salmon hits your lure, the tension causes the fishing line to "release" from the clip, allowing you to fight the fish directly on your rod without the weight of the downrigger ball.
- The Spool and Crank/Motor: This mechanism controls the deployment and retrieval of the downrigger line. You'll find both manual versions, which you crank by hand, and electric models, which retrieve the ball with the push of a button. Electric downriggers, like those offered by Cannon or Scotty, can be a game-changer when you're constantly adjusting depth or running multiple lines, though a good manual one from brands like Penn can certainly get the job done if you're on a budget.
- The Counter: This display tells you exactly how much downrigger line is out, giving you precise depth control. Most downriggers have a mechanical counter, while electric models often feature digital displays.
- The Rod Holder: Most downriggers come with integrated rod holders, positioned so your rod tip is slightly bent, indicating tension on the line, but still able to spring free when the release clip fires.
- The Swivel Base (Optional but Recommended): This allows you to rotate the downrigger in any direction, making it much easier to deploy and retrieve the ball, especially in choppy water.
Knowing these parts will make the setup process much clearer, and you'll appreciate how each element contributes to the overall effectiveness of your deep-water salmon fishing strategy.
Step-by-Step Installation and Initial Setup
Setting up a downrigger might seem intimidating at first, but if you break it down into manageable steps, it's quite straightforward. Whether you're a seasoned angler or just starting your journey into deep-water fishing on Lake Oahe, getting this right will make a huge difference.
Mounting Your Downrigger to Your Boat
First things first, you need a solid foundation. Most downriggers require a sturdy mounting point on your boat's transom or gunwale (the upper edge of the boat's side).
-
Choose Your Location:
- Transom Mount: If you have enough space at the back of your boat, transom mounts are popular, especially for larger vessels. They keep the downrigger booms clear of your main fishing area.
- Gunwale Mount: For smaller boats or if you want to fish closer to the middle of the boat, a gunwale mount is ideal. Just ensure it's not in the way of walking or casting.
- Consider Placement: You want the downrigger to be easily accessible for deployment and retrieval, but far enough from the prop wash to avoid tangles. If running two downriggers, placing them symmetrically on either side of the boat is generally best for an even spread.
- Check for Obstructions: Make sure there's enough clearance for the boom to swing and for you to operate the crank or buttons without hitting anything.
-
Install the Base Plate:
- Downriggers typically come with a base plate that bolts directly to your boat. You'll need a drill, stainless steel bolts, and appropriate backing plates or washers to distribute the stress.
- Measure Twice, Drill Once: This can't be stressed enough! Use the base plate as a template, mark your holes, and double-check everything before drilling. Ensure the bolts are long enough to go through your gunwale or transom and secure the backing plate.
- Seal the Holes: Use a marine-grade sealant, like marine silicone, around and inside the drilled holes before inserting the bolts. This prevents water intrusion, which can lead to rot or structural damage over time.
-
Attach the Downrigger Unit: Once the base plate is securely installed, you'll attach the downrigger unit itself. Most units slide into the base and are secured with a large pin or a couple of bolts, allowing for easy removal when not in use or for storage. Make sure it's snug and doesn't wobble. Many models also feature a swivel base, often an add-on, that allows the downrigger to rotate 360 degrees. This is incredibly helpful for deploying and retrieving the ball safely and comfortably, especially when solo fishing. You can often find these swivel bases and other downrigger accessories on Amazon.
Spooling Your Downrigger Cable and Attaching the Ball
Now that your downrigger is mounted, it's time to get it ready for action.
-
Spool the Downrigger Line:
- Whether you're using stainless steel cable or heavy braided line (like 150-200 lb test PowerPro or Cortland C16), follow the manufacturer's instructions for spooling.
- Tension is Key: You want to spool the line tightly and evenly to prevent it from digging into itself on the spool, which can cause frustrating snags and break-offs later. If you're using cable, a common trick is to attach the end to a stationary object, walk out the full length, and then reel it back onto the downrigger spool under moderate tension.
- Line Counter Calibration: Once spooled, run the downrigger ball down to a known depth (e.g., tie a knot at 100 feet and lower it until the knot reaches the surface) and check if your counter matches. Adjust as needed.
-
Attach the Downrigger Ball:
- At the end of your downrigger line, you'll typically have a heavy-duty snap swivel or a crimped loop.
- Simply clip your downrigger ball onto this. Make sure the connection is strong and secure. Losing a downrigger ball in deep water is a real bummer, not to mention costly! For Chinook salmon in Lake Oahe, a 10-12 pound ball is usually sufficient to hold your lines true, even with faster trolling speeds.
- For those curious about how these incredible fish grow, you might want to read our guide on how long Chinook salmon have been stocked in Lake Oahe, which explains a lot about the fishery.
Rigging Your Rod and Attaching the Release Clip
This is where your actual fishing line connects to the downrigger system.
-
Choose Your Rod and Reel:
- You'll want a medium-heavy to heavy action trolling rod, typically 7 to 9 feet long, with a sensitive tip but plenty of backbone.
- Pair it with a good quality baitcasting reel or line counter reel spooled with strong monofilament (17-25 lb) or braided line (30-50 lb) with a fluorocarbon leader (12-20 lb). The bend in the rod tip is your visual indicator that your lure is running correctly and that a fish has hit. For more details on appropriate tackle, check out our guide on Best Trolling Rods.
-
Tie on Your Lure:
- For salmon on Lake Oahe, popular choices include dodgers and hootchies, spoons (like a Northport Nailer or a smaller magnum-sized spoon), or deep-diving crankbaits. Ensure your knots are strong and your leader is appropriate for the lure.
-
Attach the Release Clip:
- There are many types of release clips:
- Stacker Releases: These clip directly onto your main downrigger cable, allowing you to run multiple lines off one downrigger, each at a different depth.
- Ball Releases: These attach directly to the downrigger ball itself.
- Adjustable Tension Clips: Many clips allow you to adjust the tension, which is crucial. You want it tight enough to hold your lure and withstand trolling speeds but loose enough to release when a fish strikes.
- Clip Your Fishing Line: Once you've chosen your clip type and adjusted its tension, run your fishing line behind the lure, approximately 10-20 feet up from the lure, and clip it into the release. The distance between your lure and the clip is called your "lead" or "dropback." Experiment with this; sometimes a longer lead is better, other times shorter.
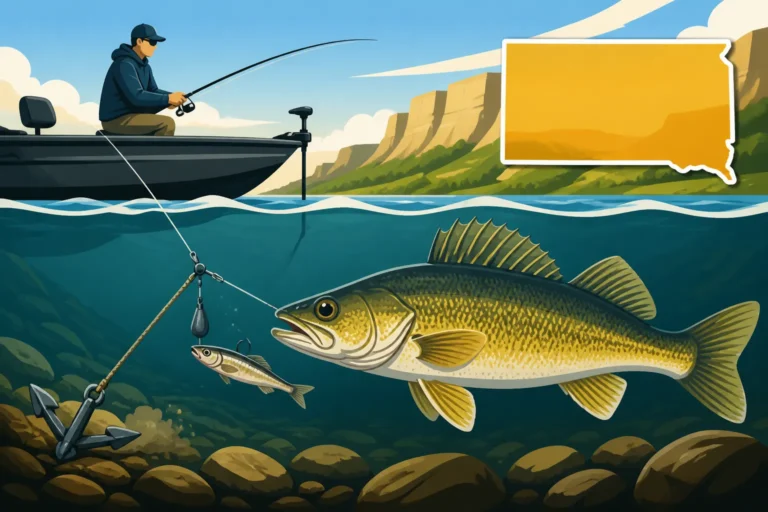
- Lower the Ball: With your fishing line clipped in and your lure in the water, slowly lower the downrigger ball to your desired depth. Watch your rod tip. It should load up with a nice, even bend once the ball is at depth and the clip is holding your line. This bend is often called "loading the rod."
- There are many types of release clips:
Mastering Downrigger Techniques for Lake Oahe Chinook
Once your downriggers are set up, the real art of salmon fishing begins. It's not just about getting the lure down; it's about making it irresistible to those majestic Chinook.
Dialing In Your Trolling Speed and Lure Presentation
Trolling speed is paramount when fishing with downriggers, especially for salmon. It affects everything from your lure's action to how well your release clips hold.
-
Finding the Right Speed:
- For Chinook salmon on Lake Oahe, typical trolling speeds range from 1.8 to 3.0 miles per hour, but this can vary greatly depending on the lure type and water temperature.
- Lure Action: Observe your lure in clear water near the boat before deploying. Does it have its intended action at your chosen speed? Dodgers and flasher/hootchie combinations often need a specific speed to work correctly. Too slow, and they don't spin or wobble; too fast, and they can foul.
- Current and Wind: Lake Oahe is a vast body of water, and currents can significantly impact your true speed through the water, even if your GPS shows a consistent speed over ground. Wind can also push your boat, making consistent speed challenging. Invest in a good GPS speed indicator and pay attention to your boat's angle relative to the current. For more detailed information, our guide on Best Trolling Speed for Salmon provides excellent insights.
- Experimentation: Start with a moderate speed (e.g., 2.2 mph) and make small adjustments. A change of just 0.2 mph can sometimes be the difference between getting bites and nothing.
-
Lure Presentation:
- Depth Precision: With your downrigger, you can place your lure exactly where the fish are holding. If you see fish at 70 feet, put your lure at 70 feet. Don't guess.
- Lead Length: The distance from your downrigger release clip to your lure (the "lead") also affects presentation. A longer lead (20-50 feet) can allow your lure to run more naturally and stealthily away from the downrigger ball, which can spook some fish. A shorter lead (10-15 feet) can make the lure run slightly deeper and closer to the ball, which sometimes triggers strikes by imitating a predator-prey scenario.
- S-Turns: Instead of trolling in a straight line, introduce gradual S-turns or gentle curves. When your boat turns, the lures on the inside of the turn will slow down and drop slightly, while the lures on the outside will speed up and rise. This change in speed and depth can often trigger a strike from following fish that were previously hesitant.
Reading Your Electronics and Adjusting for Fish Behavior
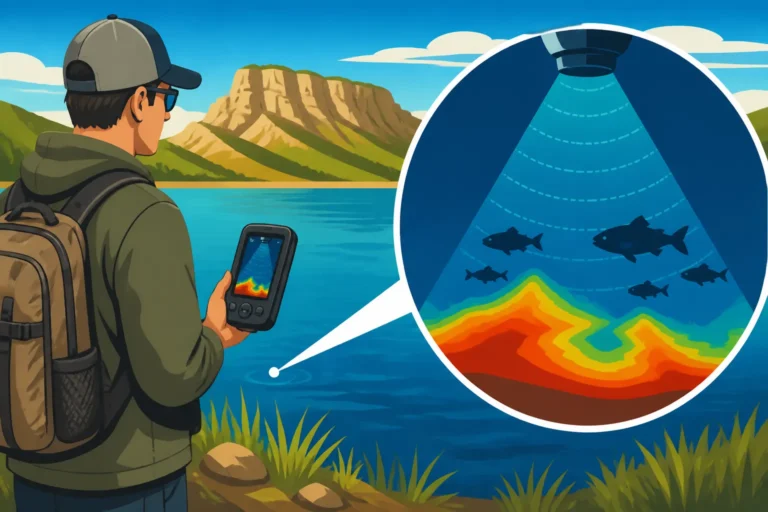
Your fish finder is your eyes below the surface. Learning to interpret what it tells you and acting on that information is crucial for downrigger success.
-
Interpreting Sonar:
- Fish Arches: Look for clear, strong fish arches, especially at specific depths. These indicate actively feeding fish.
- Bait Balls: Salmon often follow baitfish, primarily rainbow smelt and ciscoes (also known as lake herring) in Lake Oahe. If you see dense clouds of baitfish, target those areas. Our article on What Chinook Salmon Eat in South Dakota will give you a better understanding of their diet.
- Thermocline: Identify the thermocline. It usually appears as a distinct, often blurry, band on your sonar where the water temperature rapidly changes. This is a prime zone for salmon.
- Structure: Pay attention to underwater structure like old river channels, humps, points, and drop-offs. Salmon will often relate to these features. You can even find specific hotspots on Lake Oahe near the Cheyenne River.
-
Making Adjustments:
- Depth Changes: If fish suddenly appear deeper or shallower on your sonar, don't hesitate to adjust your downrigger depth accordingly. Electric downriggers make this quick and effortless, but even with manual ones, a small adjustment can yield immediate results.
- Color and Lure Changes: If you're marking fish but not getting bites, it might be time to change your lure color, size, or type. Sometimes a subtle shift from a bright spoon to a more natural-looking hootchie can make all the difference.
- Direction and Speed: If a particular pass over a structure or school of bait yields a bite, make another pass. If not, try changing your trolling direction or speed.
- Understanding the Season: Salmon behavior changes throughout the year. For instance, during the Chinook salmon spawning run dates on Lake Oahe, their behavior might shift, requiring different tactics than in the middle of summer.
Stacking Lines and Managing Multiple Downriggers
When the bite is on, or you're trying to cover more water, using multiple lines can be highly effective. This is where stacking comes in.
-
Stacking Lines:
- A stacker release clip allows you to run two fishing lines off a single downrigger cable, each at a different depth.
- How it Works: Clip one line into a stacker release, which in turn clips onto the downrigger cable, say, 15-20 feet above the main downrigger ball. Then, clip your second line into a standard release attached to the downrigger ball itself. This gives you two lures fishing at two distinct depths from one downrigger, doubling your chances!
- Depth Separation: Ensure there's enough vertical separation (at least 10-15 feet) between your stacked lines to prevent tangles, especially during turns.
-
Managing Multiple Downriggers:
- Most serious salmon anglers run at least two downriggers, one off each side of the boat. Some even run three or four with strategic placement.
- Spreading Lines: Use longer booms to help spread your lines out, reducing the chance of tangles. Stagger your depths as well; for example, if running two downriggers, one at 60 feet and another at 75 feet can cover more of the water column.
- Color Coordination: Sometimes anglers use specific lure colors or types on certain downriggers or depths, helping them quickly identify what's working when a fish hits.
- Communication: If you're fishing with a partner, clear communication is vital when deploying, retrieving, and fighting fish to avoid chaos and tangles. It's a team effort!
Troubleshooting Common Downrigger Challenges
Even with a perfectly set up downrigger, fishing can throw you curveballs. Knowing how to quickly address common problems will keep your lines in the water and increase your fishing time.
Dealing with Snags and Tangled Lines
Snags and tangles are the bane of any angler's existence, but they're particularly frustrating with downriggers due to the multiple lines and depths involved.
-
Preventing Snags:
- Know Your Bottom: Use your fish finder to understand the bottom contour and avoid known snaggy areas. In Lake Oahe, submerged timber or rock piles can be real ball-grabbers.
- Lift the Ball on Turns: When making sharp turns, especially in shallower water or near structure, briefly lift your downrigger ball a few feet to avoid dragging it on the bottom.
- Maintain Tension: Ensure your rod is properly loaded. A slack line is more prone to tangling with your downrigger cable or another line.
- Proper Lead Length: Too short a lead on your fishing line can sometimes cause the lure to foul on the downrigger cable or ball. Experiment with different lead lengths.
-
Addressing Tangles:
- Slow Down: If you suspect a tangle, immediately slow the boat down or even put it in neutral. This reduces water pressure and can prevent minor tangles from becoming catastrophic.
- Identify the Culprit: Try to figure out which lines are tangled. Is it your fishing line tangled with the downrigger cable? Or two fishing lines tangled together?
- Retrieve Systematically:
- If a fishing line is tangled with the downrigger cable, retrieve the downrigger ball slowly. As the ball comes up, you can often gently untangle the fishing line.
- If two fishing lines are tangled, you might need to bring both up carefully, slowly reeling in one while easing tension on the other. It’s a delicate dance!
- The "Reset": Sometimes, the quickest solution is to bring everything in, untangle on deck, re-bait/re-lure, and redeploy. While it takes time, it's better than prolonged frustration and potential equipment damage. Many anglers keep spare downrigger balls and release clips on hand, perhaps purchased from Amazon, just in case they lose one to a deep snag.
Maintaining Your Downrigger for Longevity
Downriggers are heavy-duty pieces of equipment, but like any mechanical device exposed to the elements, they require regular care to perform optimally year after year.
-
Rinsing After Each Use:
- Saltwater anglers know this well, but even in freshwater environments like Lake Oahe, rinsing your downriggers with fresh water after every trip is crucial. This removes dirt, grit, and any mineral deposits that can build up. Pay special attention to the spool, boom connections, and any moving parts.
-
Lubrication:
- Moving Parts: Periodically lubricate gears, pivots, and hinges with a marine-grade grease or silicone spray. Check your downrigger's manual for specific lubrication points and recommended products.
- Electric Downriggers: For electric models, ensure all electrical connections are clean and corrosion-free. Use dielectric grease on connections to prevent moisture intrusion.
-
Cable/Braid Inspection:
- Frayed Cable: If using stainless steel cable, regularly inspect it for kinks, rust, or frayed strands. Even a small fray can lead to a break, resulting in a lost downrigger ball. Replace damaged cable promptly.
- Worn Braid: If using braided line, check for excessive wear, nicks, or fading, especially near the ball. Braid can sometimes abrade on the boat or the bottom. Replace as needed.
- Leader Lines: Also remember to regularly check your leader lines on your fishing rods. Our comprehensive guide on the South Dakota Fishing Gear Checklist emphasizes the importance of inspecting all your tackle.
-
Release Clip Care:
- Cleanliness: Keep your release clips clean. Dirt or grit can affect their tension and ability to release properly.
- Spring Tension: Periodically check the springs and adjusting screws on your clips. Ensure they provide consistent tension. Replace clips that are worn out or no longer hold tension reliably.
-
Winterization (If Applicable):
- If you store your boat for the winter, ensure your downriggers are properly winterized. This usually involves a thorough cleaning, lubrication, and storing them indoors in a dry place to prevent rust and corrosion. You might even want to remove the cable or braid from the spool and store it separately if you don't plan on ice fishing with them.
By taking these proactive steps, your downriggers will serve you well for many seasons, helping you target and land those magnificent Chinook salmon on Lake Oahe and beyond.
Disclaimer
Please note that fishing regulations, license requirements, and safety guidelines can change. Always consult the latest South Dakota Game, Fish and Parks (GFP) official regulations before heading out on the water. This guide is for informational purposes only and should not replace official sources.