Best Way to Clean a Walleye
There's nothing quite like the thrill of reeling in a beautiful South Dakota walleye – that golden flash, the feisty fight, and the promise of a delicious meal. But let's be honest, for many of us, the joy can quickly turn to a bit of a chore when it comes time to clean that hard-won catch. You've spent all that time on the water, battling the elements, and now you're faced with the task of turning a whole fish into pristine fillets. It can feel daunting, especially if your knife isn't cooperating or you're unsure of the best technique. This guide is here to walk you through the process, step-by-step, so you can transform that fresh walleye into a culinary delight with confidence and ease, making the most of every ounce of that incredible fish.
Getting Prepared: The Essential Walleye Cleaning Setup
Before you even think about making that first cut, setting up your cleaning station properly is half the battle. Trust me, trying to fillet a fish with dull tools or on an unstable surface is a recipe for frustration, wasted meat, and maybe even a scraped knuckle or two. A little preparation goes a long way to making the process smooth, safe, and efficient.
Your Essential Tool Kit for Filleting Walleye
You don't need a professional fish house setup, but having a few key items will make all the difference. Think of these as your personal arsenal against the scales and bones.
First and foremost, you need a sharp fillet knife. This isn't just a suggestion; it's an absolute necessity. A dull knife will slip, tear the flesh, and make the entire process much harder and more dangerous. Imagine trying to slice through a ripe tomato with a butter knife – that's what a dull fillet knife feels like on a walleye. Many anglers swear by a flexible blade around 6-9 inches for walleye, allowing them to feel the bones as they cut. You can find some fantastic options on Amazon, often in sets with sharpeners. Don't forget a knife sharpener or honing steel. A quick touch-up before you start, and even occasionally during a longer cleaning session, can maintain that razor-sharp edge.
Next up, a fillet board is crucial. A good board will have a clamp to hold the fish's tail firmly in place, preventing it from sliding all over the place as you work. This not only makes the job easier but also much safer. Look for one with a non-slip bottom or use a damp towel underneath for extra stability. A large cutting board with a textured surface can also work if you don't have a dedicated fillet board.
You'll also want a couple of bowls or buckets. One for the fillets (keep them on ice if it's warm out!) and another for the carcass and guts. This helps keep your workspace tidy and minimizes mess. Access to running water is a huge plus for rinsing your hands and the fillets as you go. Finally, a good pair of heavy-duty gloves can provide extra grip on slippery fish and protect your hands, especially if you're new to filleting.
Keeping Your Catch Fresh Before Cleaning
The quality of your fillet starts long before you pick up the knife. A walleye that's been properly cared for in the cooler will be firmer, easier to fillet, and taste significantly better than one that's been allowed to warm up. Fish slime and blood can break down muscle tissue quickly, leading to a "fishy" taste.
As soon as you catch a walleye, get it on ice. A dedicated cooler filled with ice is non-negotiable. Don't just toss them in a dry cooler; direct contact with ice is key to rapidly dropping their core temperature. Some anglers even prefer an ice-water slush mixture, which chills the fish even faster. This rapid cooling not only preserves the meat's texture and flavor but also makes the filleting process cleaner, as the flesh will be firmer and less prone to tearing. If you're out for a full day on the water, checking your ice levels and ensuring the fish are submerged is vital. Nobody wants to put all that effort into catching a beautiful fish only to have it spoil before it hits the pan! For more on this, check out How to Keep Fish Fresh Without a Livewell.
The Art of Filleting: Step-by-Step Walleye Cleaning
Now that you're prepped and ready, it's time to get down to business. Filleting a walleye is less about brute force and more about precision and understanding the fish's anatomy. Take your time, focus on each cut, and remember that practice makes perfect. Don't be discouraged if your first few aren't picture-perfect; they'll still taste amazing!
The Initial Cuts: Setting Up Your Fillet
Lay your walleye on the fillet board, belly facing away from you, with its head pointing to your non-dominant hand (if you're right-handed, the head points left). If your board has a clamp, secure the tail.
1. The Cut Behind the Gill Plate:
Start by making a vertical cut directly behind the gill plate, down to the backbone. You'll feel the backbone when your knife hits it. Don't cut through the backbone yet. The goal here is to get a clean, deep cut that opens up the side of the fish. This cut should extend from the top of the fish, along the dorsal fin line, down towards the belly. Many people make the mistake of not going deep enough here, which makes it harder to separate the fillet later. Keep your blade angled slightly towards the head to get as much meat as possible.
2. Cutting Along the Top of the Spine:
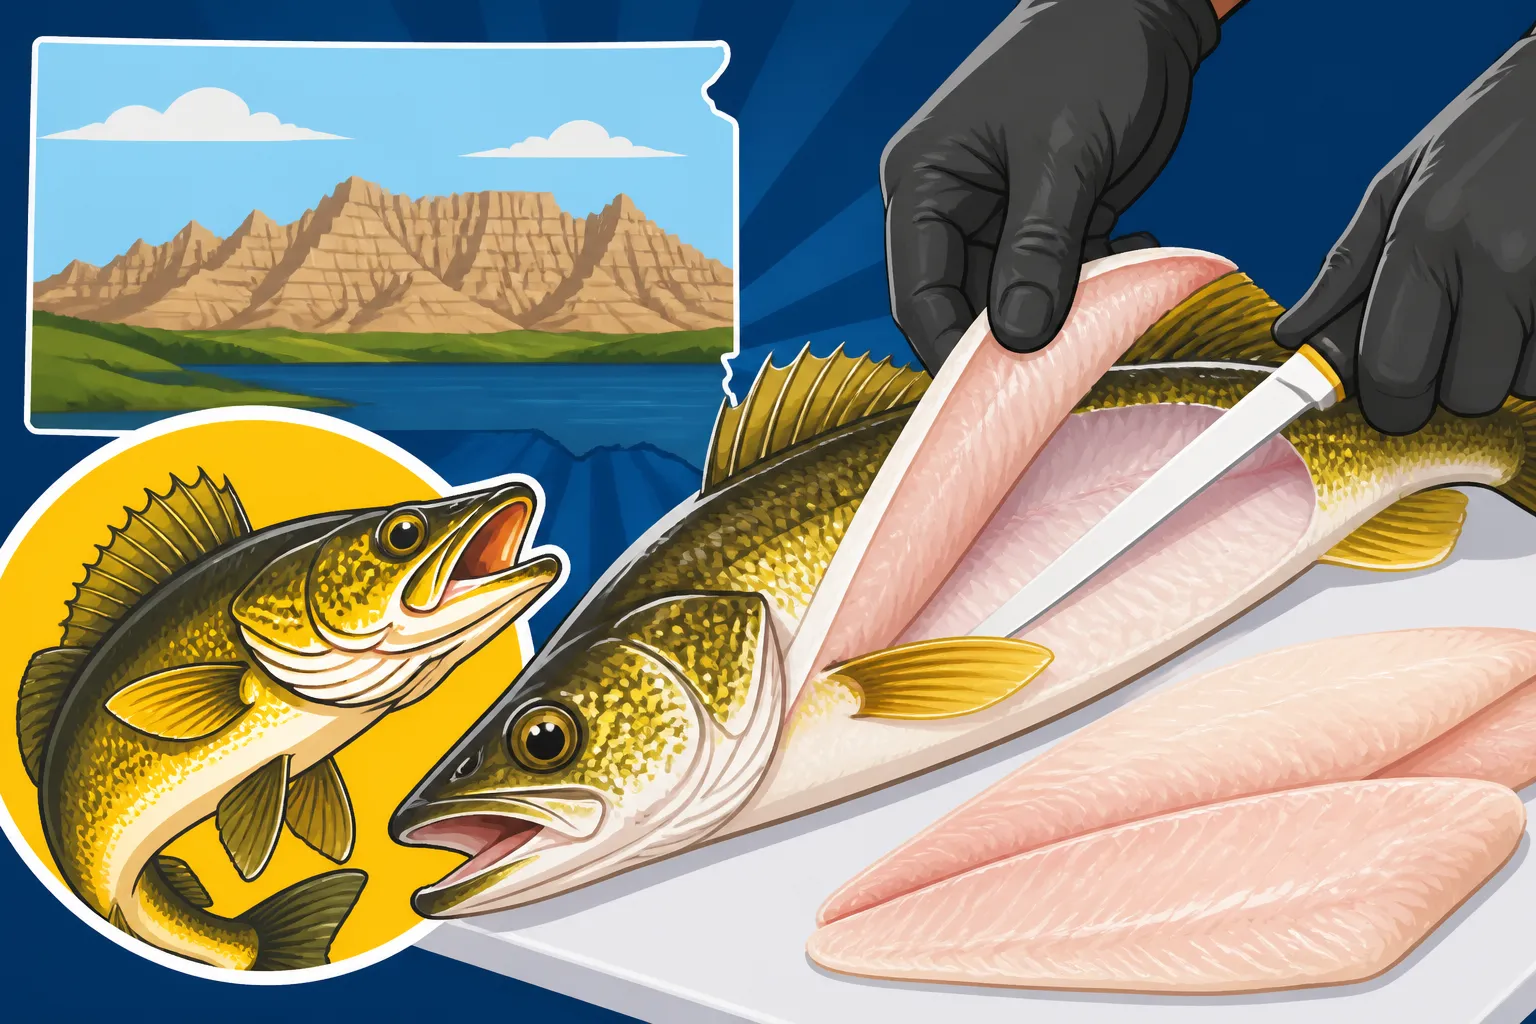
Once that initial cut is made, rotate your knife so the blade is now flat against the top of the backbone. Begin to carefully slice horizontally from the initial cut towards the tail, keeping the knife blade pressed firmly against the spine. You want to feel the bones with your knife, guiding it just above them. This is where a flexible fillet knife really shines, allowing you to contour the blade over the ribs and spine, maximizing the amount of meat you remove. Work slowly and steadily, making long, smooth strokes. The goal is to separate the fillet from the main body of the fish, leaving minimal meat on the backbone.
Separating the Fillet and Rib Cage
You've made your cut down the back and along the spine. Now, you should have a flap of meat attached mostly at the belly.
1. Reaching the Rib Cage:
As you continue cutting towards the tail, you'll eventually encounter the rib cage. This is where some anglers get a little intimidated. Don't be! Once your knife reaches the end of the dorsal fin and you've cut down the spine, you should be able to lift the fillet away from the spine.
2. Cutting Around the Ribs:
Now, carefully angle your knife downwards, following the curve of the ribs. You can either cut straight over the top of the ribs, sacrificing a tiny bit of meat but ensuring no bones, or you can try to "fillet" the meat off the top of the ribs. For walleye, the rib cage isn't as pronounced or bone-filled as some other species. The most common technique is to gently lift the fillet and guide your knife under the ribs, separating the meat from the entire rib cage. Keep the blade shallow, barely grazing the inside of the ribs. Continue this cut all the way down to the belly cavity, separating the fillet completely from the carcass. You should now have a boneless fillet (minus the skin) in your hand.
Repeat this entire process on the other side of the fish. Remember, taking your time here ensures you get the most meat and the cleanest fillets.
Skinning Your Walleye Fillet
You've got a beautiful, boneless fillet, but it still has the skin on. While some people prefer to cook with the skin on for certain preparations, removing it usually makes for a cleaner eating experience, especially with walleye.
1. The Tail-Grab Method:
Lay the fillet skin-side down on your clean fillet board. Make a small cut at the tail end, just through the skin, but not through the meat. Angle your knife blade slightly downwards, almost flat against the board, and gently hold the skin firmly with your non-dominant hand (you might want to use a cloth or paper towel for a better grip).
2. Gliding the Knife:
With a firm grip on the tail skin, slowly push your knife forward, keeping the blade flat against the skin as you separate it from the meat. The key here is to keep constant tension on the skin with one hand and a steady, almost sawing motion with the knife in the other. You want to see the skin peel back as the knife glides between the skin and the flesh. Don't rush this step, as hurrying can result in cutting through the skin or leaving too much meat attached. A truly sharp knife is a hero in this step, making it feel almost effortless.
Once the skin is removed, you'll have a pristine, boneless, skinless walleye fillet ready for rinsing and cooking!
Maximizing Your Yield and Minimizing Waste
After all that effort catching and cleaning, you want to get every last edible bit from your walleye. There are a few often-overlooked parts that can provide some fantastic extra morsels. Plus, proper storage ensures your hard work doesn't go to waste.
Don't Forget the Cheek Meat and Other Delights
Many anglers consider walleye cheek meat a delicacy, and for good reason! It's a small, tender nugget of pure flavor, often compared to a scallop. To get it, simply find the soft spot on the walleye's head, behind the eye and below the gill plate. With a small, sharp knife, make a circular cut around this area and gently pop out the small, round piece of meat. It might be small, but it's mighty delicious.
While walleye generally don't have the notorious "Y-bones" that plague northern pike, they can have a few small pin bones near the lateral line. Once you've skinned your fillet, run your finger down the middle of the fillet. If you feel any small, needle-like bones, you can remove them with a pair of clean needle-nose pliers or specialized fish tweezers. Alternatively, you can make a small V-cut along the line of bones to remove a thin strip of meat containing them. For many walleye, especially smaller ones, this isn't a significant issue, but it's worth checking. If you're looking for other species to try this on, you can also consider How to Clean a Catfish.
Some dedicated folks even use the carcass for fish stock! The head (minus the gills and eyes), bones, and any trimmings can be simmered with vegetables and herbs to create a flavorful base for soups or sauces, truly embracing the "nose-to-tail" philosophy for your catch.
Proper Storage for Lasting Freshness
Once you have your beautiful fillets, proper storage is paramount. You've worked hard to get them, and you want them to stay fresh until cooking time.
Short-Term Storage (1-2 days): For immediate use, rinse your fillets in cold water, pat them dry with paper towels, and place them in an airtight container or zip-top bag with a layer of ice underneath. Store them in the coldest part of your refrigerator. Drying them thoroughly before storage helps prevent mushiness.
Long-Term Storage (Freezing): If you're not planning to eat them within a day or two, freezing is your best bet. The goal is to prevent freezer burn, which happens when air comes into contact with the fish, drying it out and affecting flavor and texture.
One excellent method is the water-packing method. Place your rinsed and dried fillets into a freezer-safe zip-top bag. Fill the bag with cold water, just enough to completely submerge the fillets. Squeeze out as much air as possible before sealing and freezing flat. The ice encasing the fish acts as a natural barrier against freezer burn. This method is particularly effective for preserving the delicate texture of walleye.
Another great option is a vacuum sealer. These machines remove virtually all air from the packaging, creating an airtight seal that significantly extends the freezer life of your fillets. While it's an investment, many avid anglers find it invaluable for preserving their catch. You can find various models on Amazon that are highly rated for home use. Label your packages with the date to keep track of freshness. Frozen walleye typically maintain quality for 6-12 months when properly stored.
| Walleye Cleaning Steps | Key Action | Essential Tool | Why It Matters |
|---|---|---|---|
| Preparation | Keep fish on ice | Cooler with ice | Preserves flavor, firms flesh, easier to cut |
| Set up clean station | Fillet board (with clamp), bowls | Stability, safety, hygiene | |
| Initial Gill Cut | Deep cut behind gill, to backbone | Sharp fillet knife (6-9") | Establishes starting point, maximizes meat |
| Spine Cut | Slide knife along spine to tail | Flexible fillet knife | Separates fillet from carcass, minimizes waste |
| Rib Cage Separation | Guide knife under ribs | Flexible fillet knife | Creates a boneless fillet |
| Skin Removal | Hold tail, slide knife between skin & meat | Sharp fillet knife, cloth for grip | Yields skinless fillet, cleaner eating |
| Pin Bone Check | Feel for bones, remove with pliers | Fish tweezers/pliers | Ensures truly boneless fillet, better texture |
| Cheek Meat Harvest | Cut around soft spot on head | Small, sharp knife | Delicious delicacy, reduces waste |
| Storage | Rinse, dry, water-pack or vacuum seal fillets | Zip-top bags, water, OR vacuum sealer | Prevents freezer burn, maintains quality and flavor |
Common Mistakes and How to Avoid Them
Even seasoned anglers can fall into bad habits when cleaning fish. Being aware of the most common pitfalls can help you avoid them and ensure you get the best possible fillets every time. It’s all part of the learning curve, and nobody starts out as a master fish cleaner!
The Frustration of a Dull Knife
I cannot stress this enough: a dull knife is your worst enemy in the fish cleaning process. It's not just inefficient; it's dangerous. A dull blade requires more force, which increases the chance of slipping and cutting yourself. Plus, it tears the delicate flesh of the walleye, leading to ragged, unappetizing fillets and more wasted meat.
Solution: Invest in a good quality fillet knife and, more importantly, a reliable knife sharpener. Make it a habit to sharpen your knife before every cleaning session. Even a quick few passes on a honing steel can make a world of difference. If you're cleaning multiple fish, give it a quick touch-up halfway through. A truly sharp knife will glide through the meat, feeling almost effortless, and produce clean, smooth cuts that preserve the integrity of the fillet. Many excellent electric sharpeners are available, and even simple handheld options can maintain a decent edge. Finding a good quality knife, perhaps from a brand like Dexter Russell or Rapala, on Amazon can be a great starting point for your filleting journey. For more specific recommendations, consider looking up Best Fillet Knife for Walleye.
Rushing the Process: A Recipe for Mess and Waste
We've all been there: you're tired after a long day of fishing, maybe it's getting dark, and you just want to get those fish cleaned and get inside. But rushing through the filleting process is a surefire way to make mistakes. You'll leave more meat on the bones, make messy cuts, and increase the likelihood of missing bones or getting scales on your fillets.
Solution: Approach fish cleaning as the final, important step of your fishing trip, not an afterthought. Set aside enough time, put on some music, and treat it with patience. Focus on one cut at a time, making sure it's clean and precise before moving to the next. Remember, slower, deliberate movements are almost always more efficient and productive than fast, reckless ones. If you feel yourself getting frustrated or tired, take a quick break, rinse your hands, and come back with a fresh perspective. Your taste buds (and your family) will thank you for those perfectly cleaned fillets.
Not Understanding Fish Anatomy
While walleye aren't the most complex fish to fillet, a basic understanding of their bone structure can significantly improve your results. Not knowing where the spine, ribs, and pin bones are can lead to cutting into bones, leaving too much meat behind, or ending up with bone-in fillets when you wanted them boneless.
Solution: Before you make your first cut, take a moment to look at the fish. Run your hand over its body to feel the general placement of the bones. Pay attention to the gill plate and where the backbone starts. When you start cutting, use the knife blade itself to feel for the bones. You want to "ride" the knife along the bone structure, separating the meat as cleanly as possible. Watching a few online video tutorials specifically for walleye filleting can also be incredibly helpful. Seeing the technique in action can often clarify what written instructions might miss. The more you practice, the more intuitive the fish's anatomy will become, and the easier it will be to glide your knife exactly where it needs to go. This knowledge will also help you when dealing with your South Dakota Walleye Daily Limit, ensuring each fish is processed efficiently.
Learning the best way to clean a walleye is a skill that comes with practice, patience, and the right tools. With these tips, you'll be turning your fresh catch into beautiful, restaurant-quality fillets in no time, ready for your favorite recipe.
Disclaimer
This article is for general informational purposes only and does not constitute professional advice. Laws, prices and regulations vary by location and change over time. Consult a qualified professional for guidance on your specific situation.