Best Kayak Fish Finder Mount
One of the most common headaches for kayak anglers is figuring out how to securely mount their fish finder and transducer. You’ve invested in good electronics, but if they’re flopping around, getting wet, or giving you unreliable readings because of a shaky setup, it completely defeats the purpose. This guide is here to walk you through the various fish finder mounting options available for your kayak, helping you choose and install the best solution for stable, accurate readings on the waters of South Dakota.
Why a Reliable Fish Finder Mount is Non-Negotiable for Kayak Anglers
Kayak fishing offers an incredible sense of freedom and stealth, allowing you to access nooks and crannies that larger boats can't reach. However, it also comes with its own unique set of challenges, especially when it comes to electronic equipment. Unlike a big bass boat with ample flat surfaces and dry storage, a kayak presents limited, often wet, and frequently vibrating real estate. This makes a sturdy and well-thought-out fish finder mount not just a convenience, but an absolute necessity for effective angling.
Imagine spending a morning on Lake Oahe, paddling hard to your favorite walleye spot. You’re scanning the bottom, looking for those tell-tale arches, when a rogue wake hits. Your fish finder, which was only loosely secured, suddenly pivots, or worse, takes a dive into the drink. That’s a nightmare scenario no one wants to face. A cheap or ill-fitting mount can lead to constant adjustments, inaccurate readings due to movement, or even irreversible damage to your expensive electronics. Furthermore, transducer placement is critical. If your transducer isn't perfectly still and submerged, you'll get a lot of noise or missed targets, which means less fish on the line. A purpose-built mount ensures your fish finder and its transducer stay exactly where they need to be, even when you're battling choppy water or a feisty South Dakota Walleye Fishing Guide. This stability translates directly into clearer sonar images and a better understanding of the underwater world, giving you a distinct advantage.
Exploring the Main Types of Fish Finder Mounts for Kayaks
When it comes to attaching your fish finder to your kayak, you've got a variety of options, each with its own benefits and considerations. The "best" one often depends on your kayak's design, your fishing style, and how permanent you want the setup to be. It's not a one-size-fits-all situation, so understanding the different types is key to making the right choice.
Track Mount Systems: Versatility and Adjustability
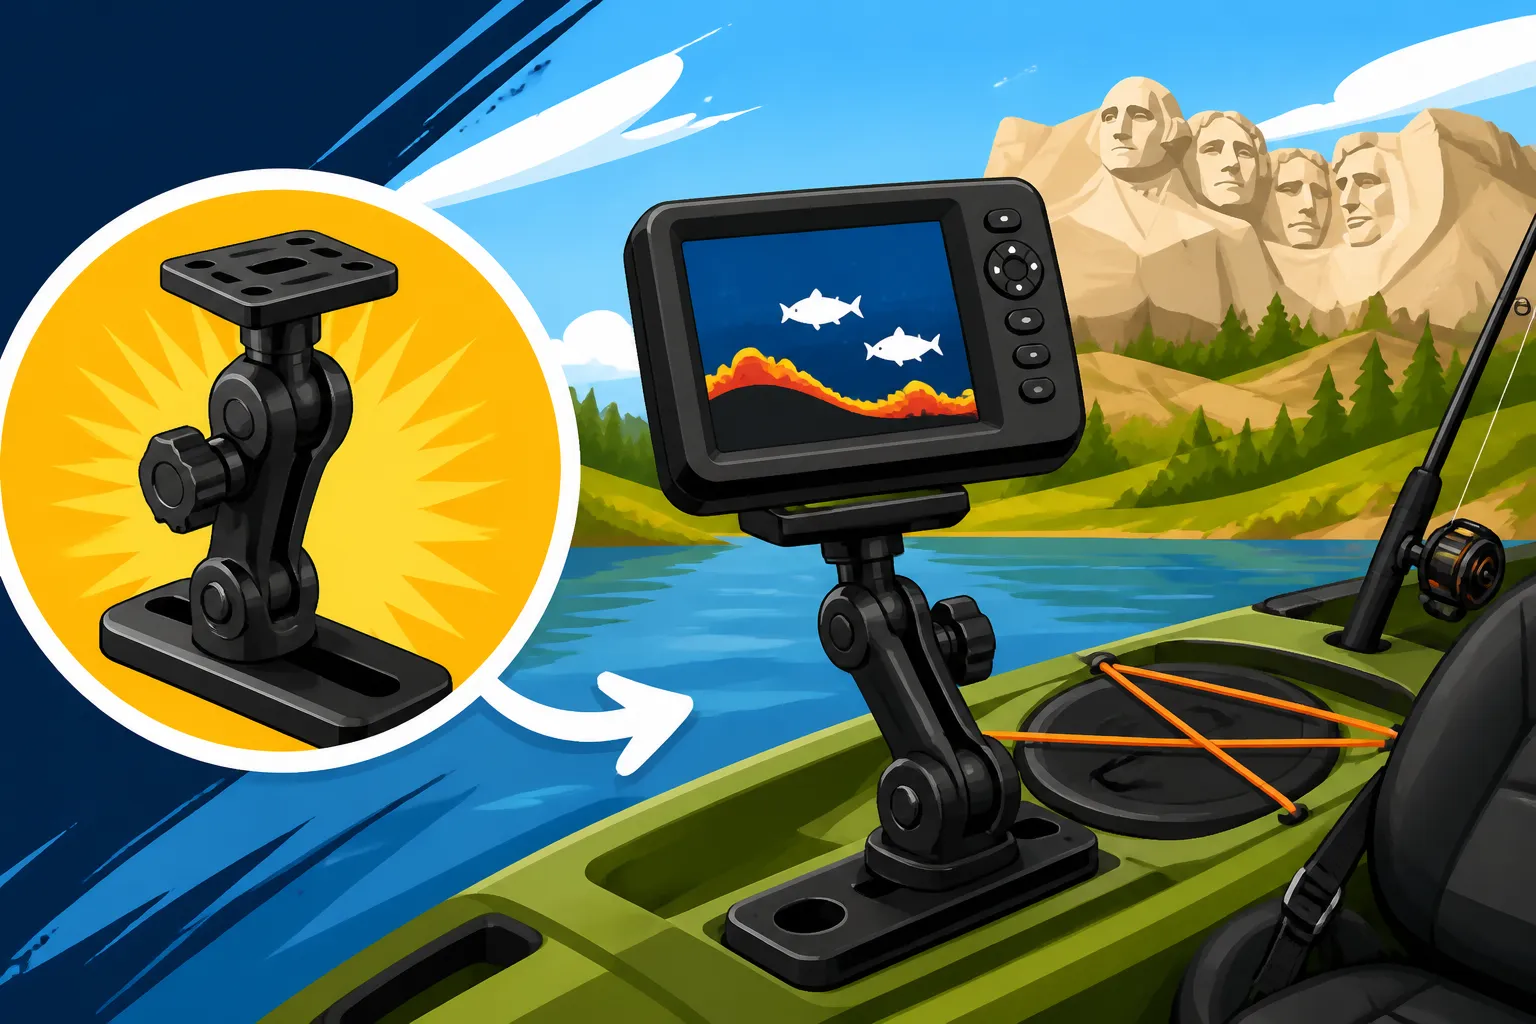
Track mount systems are arguably the most popular and versatile choice for modern kayaks, especially those with pre-installed gear tracks. Brands like Scotty and YakAttack are leaders in this space, offering robust solutions. These systems consist of a base that slides into a track on your kayak, allowing you to position your fish finder exactly where you need it. Once the base is in place, various arms and ball mounts can be attached to hold your fish finder head unit.
The beauty of track mounts lies in their adjustability. You can slide your fish finder forward or backward, pivot it, and even remove it completely when not in use. This is incredibly useful for different fishing conditions or when transporting your kayak. For instance, if you're South Dakota Kayak Fishing Gear Guide on a calm lake, you might want your screen closer for easy viewing, but in choppier conditions on a large reservoir, you might prefer it slightly further back to avoid splashes. Many track mounts also offer options for integrating a transducer arm, which extends over the side or through a scupper hole, keeping your transducer perfectly vertical and stable. You can often find a wide selection of these mounts and accessories at a large outfitter like Bass Pro Shops, making it easy to see the different configurations in person.
RAM Mounts: The Ball-and-Socket Solution
RAM Mounts are another highly favored option, renowned for their rugged construction and unparalleled adjustability. The core of the RAM system is a ball-and-socket design. You have a base ball, an arm with sockets on both ends, and a top ball attached to your fish finder's bracket. By tightening a single knob on the arm, you can lock the entire assembly into almost any conceivable position.
This "infinite adjustment" is a huge advantage for kayak anglers who need to fine-tune the viewing angle of their fish finder. Whether you're standing up in your kayak to sight fish or sitting low, you can quickly tilt and swivel your screen for optimal visibility. RAM Mounts come in different ball sizes (e.g., 1-inch, 1.5-inch, 2.25-inch), with larger sizes offering more holding power for heavier fish finders or rougher water. While some RAM bases can be track-mounted, others require drilling directly into your kayak's hull. The robust nature of RAM Mounts makes them a solid choice for the varied conditions you might encounter, from the gentle currents of a slow river to the expansive waters of Lake Oahe Fishing Guide.
Suction Cup Mounts: Quick and Temporary
For anglers who prioritize extreme portability or want a non-permanent solution, suction cup mounts can be an option. These mounts attach directly to a smooth, flat surface on your kayak's hull or deck via a strong suction cup. They often incorporate an adjustable arm to hold the fish finder.
The main draw of suction cup mounts is their ease of installation and removal. You can put your fish finder on in seconds and take it off just as quickly, which is great for short trips, rental kayaks, or if you frequently switch your fish finder between different vessels. However, they do come with significant caveats. The reliability of a suction cup can vary greatly depending on the surface texture of your kayak, temperature fluctuations, and how well it's applied. A sudden bump or splash could dislodge it, putting your valuable electronics at risk. While some anglers use them successfully for light fish finders in calm conditions, they are generally not recommended for heavy units or in rough water scenarios, such as when fishing the wind-swept sections of the Missouri River reservoirs. Always test their grip thoroughly before trusting them with your gear.
Permanent and Drill-In Mounts: For the Dedicated Angler
For those who are fully committed to a particular setup and don't mind modifying their kayak, permanent or drill-in mounts offer the utmost in stability and security. These mounts involve drilling holes into your kayak's deck or hull to bolt down a base plate. Once installed with proper sealant, they provide an unshakeable platform for your fish finder.
The process might seem daunting, as drilling into your kayak is a big step, but with the right tools and marine-grade silicone sealant, it’s a straightforward task. Many kayak manufacturers even provide designated "flat spots" for mounting accessories. The benefit here is absolute peace of mind; your fish finder isn't going anywhere. This is especially valuable for anglers who run larger, heavier fish finders or frequently fish in challenging conditions where stability is paramount. Paired with a robust transducer mount, a drill-in base ensures your sonar is always performing optimally. If you're serious about your Best Kayaks for South Dakota Reservoir Fishing and plan to use the same setup for years, this might be the most reliable long-term solution.
DIY Solutions and Custom Mounts
Some adventurous anglers prefer to create their own custom fish finder mounts using PVC pipe, cutting boards, or other materials. These DIY solutions can be cost-effective and allow for highly personalized setups that perfectly fit an angler's unique needs and kayak. For example, some might fabricate a custom bracket to hold their fish finder and battery box in one neat unit, or design a portable transducer arm that clamps to the kayak's gunwale.
While DIY can be rewarding, it requires a good understanding of material strengths, waterproofing, and how different forces will act on the mount. It's crucial to ensure any custom solution is robust enough to handle the weight of your fish finder, resist vibrations, and withstand exposure to the elements without failing. Safety should always be the top priority; you don't want a homemade mount to break and send your fish finder to the bottom of the lake. Always prioritize durable, marine-grade materials and secure fastening.
Key Factors to Consider When Choosing Your Kayak Fish Finder Mount
Selecting the perfect fish finder mount isn't just about picking one that looks cool. It's about a strategic decision that impacts your fishing experience, the longevity of your gear, and your overall safety on the water. Many factors come into play, from the type of kayak you paddle to the specific water you typically fish in South Dakota.
Kayak Type and Construction: Sit-On-Top, Sit-In, Pedal vs. Paddle
The design of your kayak significantly influences the mounting options available.
- Sit-On-Top (SOT) Kayaks: These are incredibly popular for fishing due to their stability and open deck space. Many SOTs come equipped with factory-installed gear tracks (like those often seen on Hobie or Old Town kayaks) or designated flat areas for mounting accessories. This makes track mounts or even permanent drill-in mounts relatively straightforward. Scupper holes also offer excellent opportunities for transducer mounting, keeping it protected yet fully submerged.
- Sit-In Kayaks: While less common for dedicated fishing, sit-ins can still be outfitted. Space is usually more limited, and the cockpit coaming might be the primary mounting point for a fish finder screen, possibly with clamp-on or track-mounted systems. Transducer placement often requires an in-hull mount or a custom over-the-side arm.
- Pedal vs. Paddle Kayaks: Pedal kayaks often have more robust infrastructure (like drive wells) that can sometimes be adapted for mounting or running wires, while paddle kayaks require careful routing to avoid snagging paddles. Consider how your primary propulsion method will interact with the placement of your fish finder and transducer. You want your screen easily accessible but not interfering with your stroke or pedal operation.
Fish Finder Size, Weight, and Transducer Setup
Your fish finder itself dictates a lot about the mount you'll need. A small, lightweight unit can get by with a less heavy-duty mount, perhaps even a well-regarded suction cup in calm conditions. However, larger, heavier units with bigger screens and more complex transducer cables demand a much more robust and secure mounting solution. A big 9-inch screen needs a sturdy RAM Mount with a large ball, or a heavily reinforced track mount to prevent sag or wobble, especially when navigating waves on Lake Sharpe Fishing Guide.
The transducer is just as important. Do you want it mounted permanently in-hull, exposed on the transom, or via a scupper hole?
- In-Hull Transducers: These are mounted inside the kayak, usually epoxied to the hull with marine-grade silicone. They offer maximum protection from snags and impact but can sometimes lose a tiny bit of sensitivity due to shooting through the hull material. This is a great choice for ultimate protection and often requires minimal external mounting hardware for the transducer itself, making for a cleaner setup.
- Transom/Over-the-Side Transducers: These mounts extend the transducer over the side or off the stern of the kayak, placing it directly in the water for the clearest signal. They are often part of a track mount system. The downside is that the transducer is exposed and can be vulnerable to snags on submerged structures or damage during transport. However, for precise readings, especially when actively using features like side imaging, direct water contact is often preferred.
- Scupper Hole Transducers: Specific kayaks are designed with scupper holes that can perfectly fit certain transducers. This offers a fantastic balance of protection (it's mostly within the scupper) and direct water contact. It’s a very clean setup and often requires only a specialized scupper plug or bracket.
Water Conditions and Fishing Style
The environment you fish in should heavily influence your choice. Are you primarily fishing calm farm ponds in eastern South Dakota, or are you tackling the massive currents and winds of the Missouri River reservoirs?
- Calm Waters: For tranquil lakes or slow-moving rivers, a less robust mount might suffice. Portability might be a higher priority here.
- Rough Waters: If you regularly fish large bodies of water like Lake Oahe, where winds can kick up significant chop, you need a mount that can withstand constant vibration and impact without failing. Stability is paramount, and a permanent or heavy-duty track/RAM mount is almost always the best bet. You don't want your screen bouncing around as you're trying to read structure or How to Read a Fish Finder for Walleye in challenging conditions.
Your fishing style also plays a role. If you frequently stand up to cast, you'll want your fish finder positioned where it's still easily viewable and accessible, but also out of the way of your movements. If you primarily sit, then a lower, more forward position might be ideal.
Portability, Durability, and Budget
- Portability: How often do you remove your fish finder? Do you transport your kayak frequently? If so, a quick-release track mount or RAM Mount system is incredibly convenient. If your kayak stays on a trailer or at a dock, a more permanent setup might be less of a hassle.
- Durability: Look for mounts made from marine-grade materials like high-strength composites, anodized aluminum, or stainless steel. These materials resist UV degradation, corrosion, and the general wear and tear of being outdoors. While South Dakota is freshwater, durable materials always pay off. Many options from trusted brands like Scotty or RAM Mounts are known for their longevity.
- Budget: Fish finder mounts range from relatively inexpensive to fairly pricey. Determine your budget, but remember that investing in a quality mount is protecting your even more expensive fish finder. Sometimes, spending a little more upfront saves you a lot in replacement costs later. You can often find good deals and a wide range of options across different price points on online retailers like Amazon, as well as in local shops.
Mount Type Comparison Table
To help you visualize the different options, here’s a quick comparison of the most common kayak fish finder mount types:
| Mount Type | Ease of Installation | Adjustability | Stability & Security | Transducer Integration | Best For |
|---|---|---|---|---|---|
| Track Mount | Easy, tool-free if tracks | High (slide, pivot, tilt) | High | Excellent (dedicated arm) | Versatile anglers, kayaks with tracks, varied conditions |
| RAM Mount | Moderate (may drill) | Very High (ball-socket) | Very High | Good (dedicated arm) | Anglers needing precise screen angles, heavier units |
| Suction Cup Mount | Very Easy | Moderate (some pivot) | Low to Moderate (can fail) | Often integrated | Temporary use, rental kayaks, calm water |
| Drill-In Mount | Difficult (permanent) | Low to Moderate | Excellent (most secure) | Separate options | Dedicated anglers, maximum security, heavy units |
Installation Tips and Best Practices for Your Kayak Fish Finder Mount
Once you've chosen your ideal mount, proper installation is paramount. A great mount poorly installed is no better than a flimsy one. Taking your time and following these best practices will ensure your fish finder stays put and performs flawlessly, whether you’re fishing the smallmouth bass hotspots of Lake Francis Case or the expansive waters near the Cheyenne River.
Selecting the Right Location
Placement is everything. You need your fish finder screen to be visible and accessible without interfering with your paddling, pedaling, or casting.
- For the Head Unit: Typically, the console area in front of your seat, or along the gunwale, is ideal. Ensure it's not so far forward that you have to lean excessively to see or operate it, nor so close that it restricts legroom or paddle strokes. Consider sun glare – can you easily adjust the screen angle to reduce reflections? For example, if you're Best Fishing Spots Near Pierre and the sun is high over Lake Sharpe, you'll appreciate a mount that allows easy tilting.
- For the Transducer: This is critical for clear readings.
- Direct Water Contact: For over-the-side or scupper mounts, ensure the transducer is fully submerged but not too deep that it creates excessive drag or gets snagged. It should be vertical to the water for the best sonar cone. Avoid placing it near any bubbles or obstructions that could disrupt the signal.
- In-Hull Mounting: If going in-hull, find a flat, clean spot inside the kayak's hull that has no air bubbles trapped in the plastic layers. This area should be directly under the water, not above a scupper hole or an area that could trap air. Clean the area thoroughly, sand lightly for better adhesion if recommended, and use a marine-grade silicone or epoxy for a strong, bubble-free bond.
Routing Wires and Power Supply
Neat and secure wire routing isn't just for aesthetics; it prevents snags, damage, and ensures reliable power.
- Power Source: Most kayak fish finders run on a 12V battery, often a small sealed lead-acid (SLA) or a lithium-ion (LiFePO4) battery. Place the battery in a waterproof box or dry bag in a secure location, like a hull compartment or a designated battery tray, to protect it from water and impacts.
- Cable Management: Run your transducer and power cables along existing pathways or inside the hull where possible. Use cable clips, zip ties, or conduit to secure them, preventing them from flapping around or getting tangled in your feet, paddle, or fishing lines. Always leave a little slack at connection points to prevent strain. Many anglers use cable glands or deck seals to pass wires through the hull cleanly and keep water out. Consider where you’ll put a Best Fish Finders for South Dakota Lakes on the dash, then route wires around it.
Testing and Maintenance
Once everything is installed, don't just hit the water and hope for the best.
- Pre-Launch Check: Before leaving home, give everything a good wiggle. Is the mount firm? Is the fish finder head unit securely attached? Are the cables neat and out of the way?
- On-Water Test: Head to a calm body of water for your first run. Paddle around, turn sharply, and note how the fish finder and transducer perform. Check the sonar screen for clear readings. If you see intermittent signals or strange readings, it might indicate an issue with transducer placement or angle. Test different speeds.
- Regular Maintenance: After each trip, especially if you've been in dirty water or encountered rough conditions, give your mount and electronics a quick rinse with fresh water. Check all bolts and fasteners for tightness, as vibrations can loosen them over time. Inspect cables for any nicks or fraying. Proper maintenance extends the life of your gear and prevents unexpected issues on your next South Dakota Fishing Gear Checklist. Taking care of your equipment means more time catching South Dakota Chinook Salmon Fishing Guide and less time troubleshooting.
Disclaimer
This article is for general informational purposes only and does not constitute professional advice. Laws, prices and regulations vary by location and change over time. Consult a qualified professional for guidance on your specific situation.