How to Read a Fish Finder for Walleye
It's incredibly frustrating, isn't it? You spend good money on a fancy fish finder, get it mounted on your boat, and then stare at a colorful screen that looks more like abstract art than a helpful tool to find walleye. Many anglers feel completely lost trying to decipher those squiggles and blobs. This comprehensive guide is here to unravel the mysteries of your fish finder, helping you understand exactly what you're seeing so you can stop guessing and start catching more South Dakota walleye.
Understanding the Fundamental Principles of Your Fish Finder
Before we even begin to look for walleye, it’s crucial to understand how your fish finder actually works. Think of it as your underwater eyes, but instead of light, it uses sound waves. Without grasping these core principles, you'll always be playing a guessing game with your screen.
The Transducer and Sonar Waves
At the heart of every fish finder is the transducer. This unsung hero is the component that sends out sound waves, or "pings," into the water and then listens for their echoes. These sound waves travel down through the water column until they hit something – a fish, the bottom, a submerged tree, or even a school of baitfish. When they bounce back, the transducer picks up these echoes, and your fish finder's processor translates them into the images you see on your screen. The time it takes for a sound wave to travel down and back helps the unit determine the depth of the object.
What many anglers don't realize is the critical role of the transducer's placement. If it's not mounted correctly – too shallow, too deep, or in an area with turbulent water – it can cause significant interference, resulting in a screen full of clutter or inaccurate readings. Imagine trying to see clearly through a wavy, distorted window; that's what a poorly mounted transducer does to your fish finder. Many newer units feature advanced transducers that incorporate multiple technologies like 2D sonar, Down Imaging, and Side Imaging into a single, sleek package, which you can often find readily available on platforms like Amazon, making setup a bit easier than piecing together separate components.
Sonar Frequencies and Cone Angles
Fish finders operate using different sonar frequencies, and understanding them is key to effective walleye fishing. Generally, you'll encounter high frequencies (like 200 kHz) and low frequencies (like 50 kHz).
- High Frequencies (e.g., 200 kHz): These provide greater detail and resolution, making it easier to distinguish individual fish and subtle changes in structure. However, they don't penetrate as deep and have a narrower cone angle. This means they're excellent for shallower water, covering a smaller area directly beneath your boat, and giving you a crisp image of what's precisely there. If you're looking to meticulously pick apart a rock pile on Lake Sharpe for smallmouth bass or target individual walleye holding tight to a break line, a higher frequency will give you the clarity you need.
- Low Frequencies (e.g., 50 kHz): These penetrate much deeper into the water column and offer a wider cone angle. While they provide less detail (a fish might look like a blob instead of a crisp arch), they allow you to scan a much larger area of water at once, making them ideal for deep-water searching or covering vast areas like the main basin of Lake Oahe. Using a lower frequency first to locate general areas of interest, and then switching to a higher frequency to refine your search, is a common and highly effective strategy for many anglers.
The "cone angle" refers to the shape of the sonar beam as it spreads out from the transducer. A narrow cone (typically associated with higher frequencies) offers a precise view of a smaller area, while a wider cone (lower frequencies) covers a broader expanse. The deeper the water, the larger the area a wide cone will cover, which is fantastic for finding schools of baitfish or scattered walleye in deep water, but remember that the resolution decreases as the cone widens. Knowing when to switch between these frequencies based on depth and desired coverage is a skill that comes with practice but greatly enhances your ability to "read" the underwater world.
Decoding Your Fish Finder Screen for Walleye Signatures
Now that we've covered the basics of how the magic happens, let's dive into what you're actually seeing on that screen and, more importantly, how to interpret those images specifically for walleye.
Interpreting 2D Sonar Displays
The traditional 2D sonar display is often where most anglers start, and it remains incredibly effective. On a 2D screen, you'll see a history of sonar returns scrolling from right to left. The right edge of the screen is "real-time," showing what's directly under your boat right now, and as you move, those returns scroll to the left.
- Bottom Line: This is usually the thickest, most consistent line at the bottom of your screen. It represents the lakebed. Its thickness can tell you a lot about the bottom composition: a hard, flat bottom (like rock or compacted clay) will often show a strong, thin, and bright line, sometimes with a "second return echo" below it, indicating a very hard surface. A softer, muddier bottom will appear thicker and less distinct. Look for changes in the bottom line – these indicate structure like drop-offs, humps, or submerged points, which are prime walleye hangouts. Understanding these bottom contours is critical for effective walleye fishing, especially when trying to target specific depths. You can use your unit to help you with How to Read Contour Lines on a Lake Map.
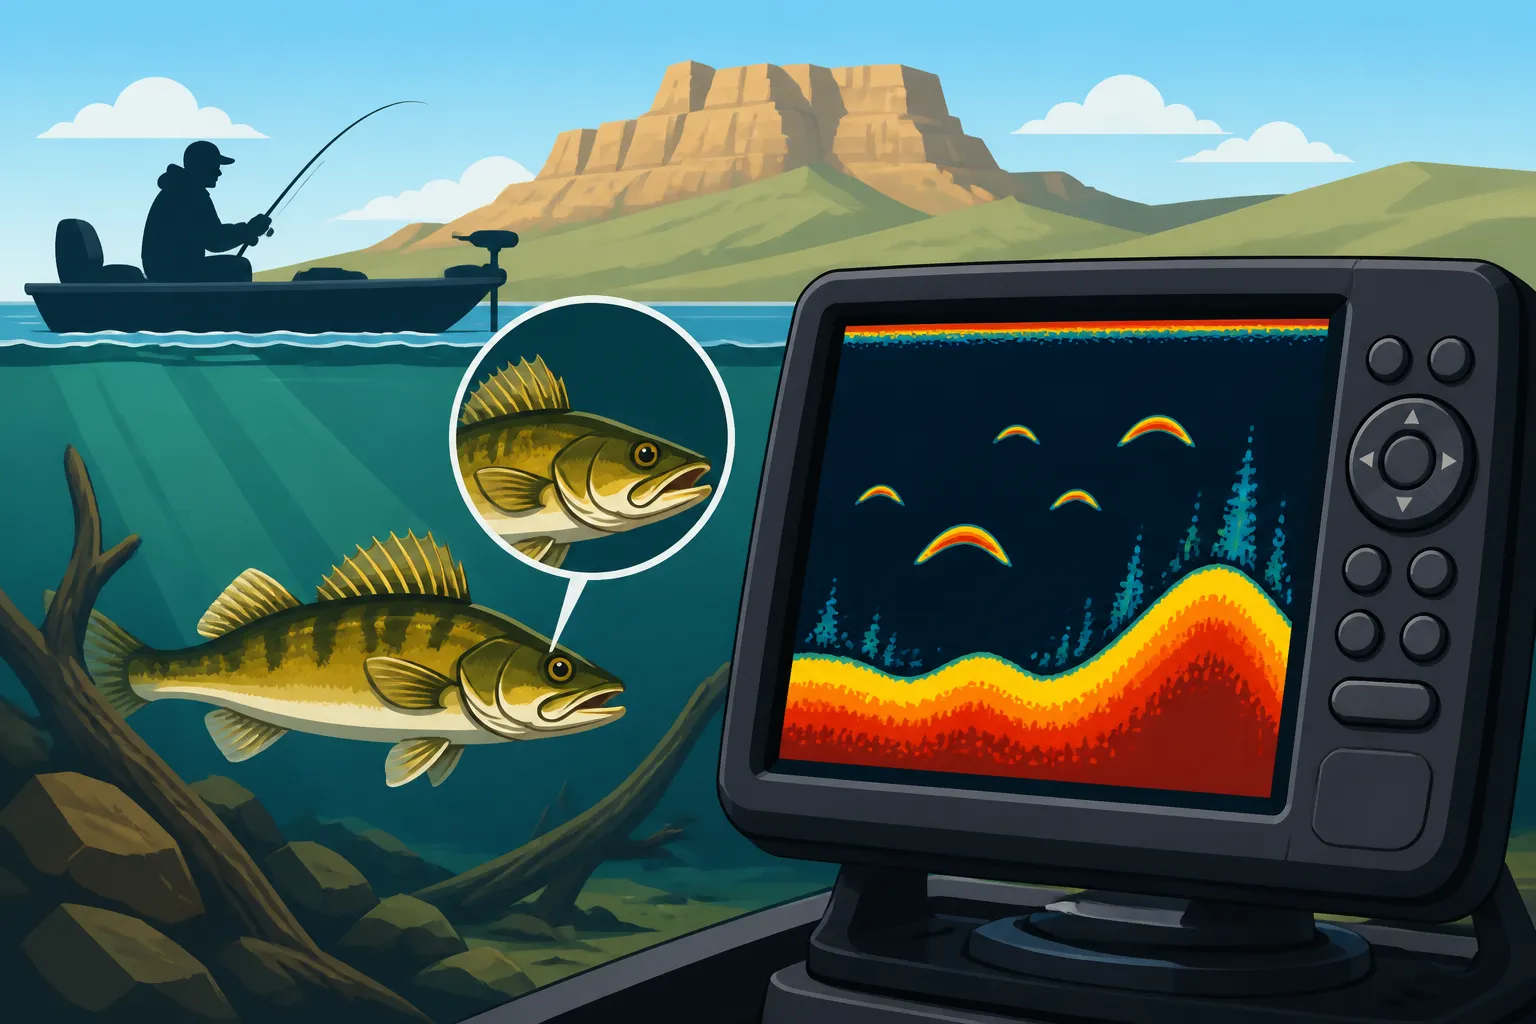
- Fish Arches: The classic "fish arch" is what every angler hopes to see. This arch forms because as your boat moves over a fish, the sonar beam "sees" the fish at the edge of the cone, then directly beneath the boat (where the return is strongest), and then at the other edge. The size and thickness of the arch can give clues about the fish's size. A large, thick arch generally means a bigger fish. Walleye often appear as distinct, strong arches, sometimes holding very close to the bottom or structure. Don't be fooled by small, thin arches that might indicate smaller baitfish or panfish, though knowing where the bait is is still incredibly valuable!
- Baitfish Schools: These will appear as dense clouds or clumps of small dots on your 2D screen. Walleye are predators, and where you find baitfish, you'll often find walleye nearby, especially during active feeding periods. These bait balls can be suspended in the water column or clinging to structure. On the Missouri River system, you might see massive schools of gizzard shad, which are a primary forage for the walleye.
Understanding Down Imaging and Side Imaging
Modern fish finders often incorporate more advanced sonar technologies that provide photo-like images of what's beneath and to the sides of your boat. These can be game-changers for targeting walleye, offering a level of detail that traditional 2D sonar simply can't match. Many advanced units, often found on Amazon, combine these technologies for a complete underwater picture.
- Down Imaging (or DownScan, ClearVü): This technology uses a very thin, high-frequency beam to create a detailed, almost photographic image directly beneath your boat. Instead of arches, fish will appear as bright white "rice grains" or distinct blobs, and structure like trees, rock piles, or brush will look incredibly realistic. For walleye, Down Imaging is fantastic for seeing exactly how fish are relating to structure. Are they buried in a submerged tree? Are they tight to a rock outcropping? Down Imaging will show you with remarkable clarity, which can be invaluable when trying to target specific fish.
- Side Imaging (or SideScan, StructureScan): This is perhaps the most revolutionary technology for covering water and locating structure and fish off to the sides of your boat. Side Imaging sends out beams horizontally, scanning wide swaths of water (often up to 100-200 feet on each side). The returns are displayed as a picture, revealing contours, submerged objects, and fish in incredible detail. For walleye anglers, Side Imaging is a scouting tool par excellence. You can quickly scan vast areas of Lake Francis Case or Lake Oahe for hidden humps, submerged roadbeds, or rock reefs that traditional 2D sonar might miss. Walleye often appear as small white "dots" or "streaks" within the shadows of structure or alongside bait balls. Once you've located a promising area with Side Imaging, you can then switch to 2D or Down Imaging to get a more precise view directly beneath your boat. This ability to efficiently "How to Find Walleye on a New Lake" makes Side Imaging an indispensable tool.
Walleye-Specific Signatures and Common Misinterpretations
Walleye are often structure-oriented fish, meaning they like to relate to changes in the bottom, drop-offs, humps, and points. They're also notorious for hugging the bottom, especially when inactive or pressured.
- Bottom Huggers: When walleye are tight to the bottom, they might appear as flattened arches or simply "bumps" on the bottom line on your 2D sonar. This is where Down Imaging really shines, as it can often distinguish a walleye from a rock with greater clarity. If your fish finder has a "bottom lock" feature, it can help exaggerate these bottom-hugging fish.
- Suspended Walleye: While often associated with the bottom, walleye will suspend in the water column, especially when actively chasing baitfish. Look for arches or distinct blobs (on Down Imaging) suspended above structure, near channels, or within schools of bait. On large reservoirs, particularly the Missouri River lakes, understanding the "South Dakota Fishing Depth Charts by Season" can give you a head start on where to look for these suspended fish.
- Distinguishing from other species: This is tricky but comes with experience. Large, strong arches could also be northern pike, catfish, or largemouth bass. The context of where you're fishing (e.g., Black Hills trout streams will have different species than eastern glacial lakes) and how the fish are relating to structure can offer clues. Catfish, for instance, often appear as very strong, thick arches and are frequently found near the bottom in murky water, especially in river systems. When you're "How to Catch Walleye at Night in Summer," they might appear more aggressively suspended as they ambush bait.
- Avoid Clutter Confusion: Don't confuse actual fish with thermoclines, air bubbles, or turbulence. A thermocline often appears as a distinct, hazy horizontal line on your 2D sonar, indicating a temperature change. Air bubbles from your boat or a prop wash can create significant clutter near the surface. Adjusting your sensitivity settings can often help mitigate these false readings.
Fine-Tuning Your Fish Finder Settings for Optimal Walleye Detection
Having the right technology is one thing; knowing how to dial it in for the conditions you're fishing is another. Incorrect settings can render even the most expensive unit useless.
Adjusting Sensitivity and Gain
The sensitivity (often called gain on some units) is arguably the most critical setting. It controls how strongly your fish finder listens for echoes.
- Too Low: If the sensitivity is too low, your screen will be very clean, perhaps too clean. You'll miss weaker echoes from smaller fish, baitfish, and even some structure. It's like having your radio turned down so low you can only hear the loudest parts of a song.
- Too High: If the sensitivity is too high, your screen will be full of "noise" or clutter – false echoes from plankton, tiny particles, or even the water itself. It's like static on that radio. While you might see more, it's harder to distinguish real targets.
The goal is to find the sweet spot: high enough to pick up walleye and baitfish, but low enough to minimize clutter. A good starting point is usually around 75-85% of the maximum sensitivity. Then, you'll need to adjust it continually based on water clarity, depth, and your boat speed. In clear water, you might be able to run higher sensitivity; in murky water, you might need to back it off. When you're "Trolling for Walleye on Lake Oahe," you might run different sensitivity than if you're Jigging Techniques for Missouri River Walleye because boat speed affects the returns.
Chart Speed and Depth Range
These two settings control how the information scrolls across your screen and the depth area your unit is focusing on.
- Chart Speed: This determines how fast the historical data scrolls across your screen. A faster chart speed (more data displayed per second) will stretch out fish arches, making them easier to interpret, and give you a more detailed real-time view of what's beneath the boat. This is often preferred when actively fishing or trying to pinpoint specific targets. However, it means less historical data on screen. A slower chart speed compresses the data, showing more history but making it harder to distinguish individual targets. Experiment to find what works best for your particular fishing style and the speed you're traveling.
- Depth Range: Most fish finders will automatically adjust the depth range, but sometimes you'll want to set it manually. If you know you're fishing in 20-30 feet of water, setting your range to 0-40 feet will make the screen less cluttered and show the bottom in greater detail. If you're constantly fishing in different depths, auto-range is usually sufficient. Manually setting the depth range can also make a big difference when targeting walleye that are holding at a specific depth, such as the Water Depth Where Walleye Feed on Lake Oahe in July.
Color Palettes and Display Modes
Modern fish finders offer various color palettes. These different color schemes can significantly impact how you interpret the images. Typically, brighter, more intense colors represent stronger returns (bigger fish, harder bottom), while dimmer colors indicate weaker returns.
- Experimentation is Key: Spend time cycling through the different color palettes your unit offers. What looks good to one angler might be confusing to another. You'll find that certain palettes make distinguishing fish from the bottom much easier for your eyes. Some anglers prefer palettes with high contrast, while others like more subtle transitions. The best palette is the one that allows you to consistently identify walleye and structure quickly and accurately.
- Split-Screen Views: Many fish finders allow you to display multiple sonar technologies simultaneously in a split-screen format. For example, you might run 2D sonar on one side and Down Imaging or Side Imaging on the other. This is incredibly powerful. You can use Side Imaging to scout a wide area for structure and fish, and then switch to 2D or Down Imaging on the other half of the screen for a detailed look at what's directly beneath your boat as you pass over it. This integrated view provides a much more comprehensive understanding of the underwater environment, truly enhancing your South Dakota Walleye Fishing Guide efforts.
Practical Tips and Troubleshooting for Walleye Anglers
Even with a good understanding of the technology and settings, putting it into practice on the water can still present challenges. Here are some practical tips to help you maximize your fish finder's potential for walleye and troubleshoot common issues.
Integrating with GPS and Mapping
Your fish finder is only half the equation. Most modern units come with integrated GPS and mapping capabilities, and this combination is incredibly powerful for walleye fishing.
- Marking Waypoints: When you see a promising walleye arch or a significant piece of structure (like a rock hump, old submerged timber, or a sharp break) on your screen, immediately mark a waypoint. This is your digital breadcrumb trail. You can then use your GPS to return to that exact spot. This is invaluable on large bodies of water like Lake Oahe or the glacial lakes where featureless expanses can hide prime walleye real estate.
- Mapping for Strategy: Use your detailed lake maps (either pre-loaded or downloaded from sources like Navionics or Lakemaster, which you can often purchase with gift cards or find deals for on Amazon) to plan your fishing routes. Look for contour lines indicating subtle changes in depth, submerged points, or old creek channels. These are all prime walleye ambush points. You can then use your sonar to confirm what the map is showing and identify active fish. Knowing where the structure is first allows you to scan more efficiently with your fish finder.
- Creating "Tracks": Record your boat's track as you move. This allows you to retrace successful paths or systematically cover an area. If you're "Trolling for Walleye on Lake Oahe" and hit a hot streak, saving that track means you can repeat the exact path over and over.
Maximizing Efficiency with Your Fish Finder
Using your fish finder effectively means more than just seeing fish; it means using the information to make better fishing decisions.
- Slow Down and Scan: Especially when you're looking for new spots or trying to decipher subtle structure, slow your boat down. Traveling too fast can distort your sonar returns and make it difficult to get a clear picture of what's beneath you. Side Imaging is an exception, as it works well at slightly faster speeds for scanning, but for detailed 2D or Down Imaging, a slow, controlled pace is best.
- Practice in Clear Conditions: If you're new to your fish finder, take it out on a calm, clear day. Drop a jig or a weighted lure directly under your boat and watch it on the screen. See how it appears. Drop it near a known piece of structure or even just cast a minnow bucket with some minnows and watch how the school appears. This kind of real-world practice is invaluable for building confidence in what you're seeing.
- Learn Your Unit's Peculiarities: Every fish finder model has its quirks. Read your manual (yes, really!) and spend time in the simulator mode if your unit has one. Many anglers just power them on and go, but taking the time to learn the specific features and menu layouts of your Lowrance, Humminbird, Garmin, or Raymarine unit will pay dividends. Many accessories, from transducer mounts to protective covers, are readily available on Amazon, which can help optimize your unit's performance and longevity.
Common Troubleshooting Scenarios
What happens when your screen goes blank, or you're getting nothing but static? Don't panic!
- Loss of Bottom Reading: This often means your transducer is out of the water (when running on plane) or there's an obstruction. Check your transducer for weeds, debris, or damage. Ensure it's properly submerged and not experiencing prop wash interference.
- Clutter/Noise: Too much sensitivity is the most common culprit. Reduce it incrementally until the screen cleans up but you can still see fish. Electrical interference from other electronics (like trolling motors, especially if not wired correctly) can also cause noise. Check connections and battery health.
- No Fish Arches: Sometimes the fish just aren't there, or they're so tight to the bottom that they blend in. Adjust your sensitivity, try a different frequency, or use Down Imaging to confirm. If you're still seeing nothing, it might be time to move to a new spot. Sometimes the problem isn't the unit, but the South Dakota Fishing Season Dates and Limits being off for active walleye.
Mastering your fish finder is an ongoing journey, not a destination. With practice, patience, and a solid understanding of these principles, you'll be reading your screen like a seasoned pro, pinpointing walleye, and greatly increasing your chances of a successful day on the water. You might even find specialized books or online courses on Amazon dedicated to specific fish finder models or advanced techniques, further enhancing your learning.
Disclaimer
Please note that fishing regulations, license requirements, and local rules can change. Always consult the official South Dakota Game, Fish and Parks (GFP) website or their current fishing handbook for the most up-to-date information before heading out on the water. This guide is for informational purposes only.